Thursday, April 21, 2022

The nuances of MySQL indexes

Developers and database administrators know it – there are many nuances that need to be taken care of to ensure that database performance doesn’t dive into the ground and that database performance doesn’t cause problems either now or in the future.

One of the core aspects surrounding database performance for ages are indexes – for ages, they’ve been the core cause of increased query performance, but they’re also shrouded in mystery. No matter if looking at B-tree indexes, composite indexes, spatial indexes, or any other type of indexes available in our database management system of choice, they all operate differently and that they all have unique upsides and downsides. Then the advantages and disadvantages of index types are unique to the database management system that is in use. This post, however, is focused on MySQL and its flavors (Percona Server and MariaDB); all tips applicable to MySQL apply to Percona Server and MariaDB as well.

Types of indexes available in MySQL

To figure out all of the nuances relevant to indexes (which are also referred to as keys) in MySQL, you must understand some basics about how they work and for what purposes are they meant to accomplish in the first place. MySQL offers the following types of indexes:

  1. B-Tree (short for Balanced Tree) indexes are usually referred to as the “ordinary” indexes. This definition is partly true because there aren’t that many impressive things surrounding them: such indexes are frequently created by database administrators looking to improve search query performance, but they don’t do many things outside of that (I’ll will get into what each type of index does in a second.)
  2. Hash indexes are used only by the MEMORY storage engine (for those who are not very familiar, MySQL lets users choose from a couple of storage engines, InnoDB being the main one) and they are known for allowing users to perform exact lookups (any search query that uses the operators = or <=> would use such kind of an index). Such indexes are generally very fast due to their design but have limited use cases due to the limits imposed on them by MySQL – user defined hash indexes are only supported by the MEMORY storage engine.
  3. Spatial indexes are used for geographical data indexing.
  4. Prefix indexes usually cover a prefix (a part of) a column.
  5. Composite indexes are usually also called multicolumn indexes and, as the name suggests, such indexes usually function on multiple columns at once.
  6. Covering indexes are sometimes confused with composite indexes – while composite indexes cover multiple columns, covering indexes cover only the columns required for the query to execute. A covering index is a special kind of index – such an index is in use when all fields required for a query to execute are included in the index. When a covering index is in use, MySQL can read the index instead of reading the disk.
  7. Clustered indexes usually store tables in a B-tree index structure. All indexes that aren’t clustered indexes are known as secondary indexes.

When looking at everything from a high level, the wide variety of indexes can get a little confusing, so to get a better understanding of what they are and what they do, we must dive a little deeper.

Indexes provided by MySQL in detail

Indexes are usually used to improve SELECT query performance at the expense of slowing down UPDATEs, DELETEs, and INSERT procedures. Slow data insertion is the price to pay for increased search query performance. When data is inserted, deleted, or updated, the indexes have to be updated at the same time. If a huge portion of the data available within the database infrastructure indexed, it might become a pretty big issue in the long run. However, benefits may quickly outpace disadvantages when looking at the entire workload. Here’s a simple table explain which type of index to use when:

Type of Index

When to Use?

Why?

B-tree (Balanced tree) Indexes

When needed to increase search (SELECT) query performance with queries that involve the operators =, <, >, <=, >=, LIKE queries, or to retrieve records falling within a given range.

Balanced tree indexes are suitable for use in search operations – they will help increase the performance of search queries in almost all cases from simple queries like SELECT * FROM demo WHERE column = ‘value’ to specific wildcard-based queries like SELECT * FROM demo WHERE column LIKE ‘value%’;, though, in this case, make sure that the wildcard is at the end of the statement because if not, the index might be useless.

Hash indexes

Whenever needing rapid search query performance when using the MEMORY storage engine available in MySQL.

Hash indexes come with an Achilles’s heel – the MEMORY storage engine – but at the same time offer blazing fast performance. Such an index type can be used only for equality comparisons on the entire key which don’t often have many use cases. Still, you never know when you might come across a situation that might require them, so it’s best to keep the features offered by them in mind.

Spatial indexes

These kinds of indexes have a specific use case – they’re a fit for geographic (in other words, geospatial, hence the name), data. A spatial index is a R-Tree index unless the storage engine supports non-spatial indexing of spatial columns. In that case, the storage engine creates a B-tree index. These indexes will only be useful when accessing GIS-related data inside of MySQL via GIS-related functions that include MBRContains, MBRCovers, and MBREquals (see the documentation for further information.)

When needing to search through geographical data (look at the name), these indexes will be the way to go. however, do keep in mind that these kinds of indexes have a weakness – they can be created only on InnoDB and MyISAM storage engines – columns using these kinds of indexes must also be defined as NOT NULL as well.

Prefix indexes

Such indexes are frequently used when the column indexed is too big and disk space is too precious – prefix indexes help to index only a part of the column while at the same time being careful about the index consuming disk space. That’s a golden medium in scenarios where disk space is scarce and performance is an issue, too.

This kind of indexes are useful when wanting to improve query performance, but are low on disk space – in that case, B-tree or other kinds of indexes would probably consume a lot of space. When using prefix indexes, chances are that the performance of SELECT queries will improve at least a little bit and make sure that our indexes consume as little disk space as possible.

Composite (multicolumn) indexes

Such indexes are used when the need of indexing multiple columns appears.When one index is aimed at multiple columns at the same time, it’s a multicolumn, or composite index.

Such indexes are useful with queries involving AND operators.

These kinds of indexes can be used to satisfy queries like SELECT * FROM demo WHERE c1 = ‘something’ AND c2 = ‘something’, etc. The fact that the query involves a second, third, or fourth column should be a good enough reason to consider using a composite index. Bear in mind that MySQL reads columns left to right and that your composite index can consist from a maximum of sixteen (16) columns. You can index less columns, but not more.

Covering indexes

Such indexes cover all of the columns required for a query to successfully execute – once such indexes are in use, queries will retrieve results from the index itself and not from the disk. This will save disk I/O because MySQL will provide results derived from the index which is a smaller object.

Use covering indexes to save disk I/O. In other words, covering indexes will be very useful for queries like SELECT c1, c2, c3, c4, c5 FROM demo WHERE c3 = ‘demo’; – In this case, the index covers all the fields and there is no need to use the actual table

Clustered indexes

Such indexes are frequently PRIMARY KEYs inside of a specific table or UNIQUE INDEXes with all of their columns defined as NOT NULL.

Such indexes are very useful if we want one column to increment automatically once data is added to another column, but keep in mind that there cannot be more than one clustered index – a clustered index is a table stored in an index B-tree structure. If our table contains a PRIMARY KEY, the clustered index is the primary key (our primary index will then be called PRIMARY) – if we don’t have a PRIMARY KEY and have a UNIQUE INDEX, the clustered index is the unique index.

The table provided above should help you decide when and what kind of index type you should use. Keep in mind, however, that knowing the features of indexes provided above will only act as a small part of your decision. When placing the entire puzzle together, your decision will inevitably be also influenced by other factors such as whether your database infrastructure is optimized for performance or not, what storage engine you decide to use, how much data you have, how many rows are unique (if any), etc.

What Factors to Consider when Indexing?

As stated, once you understand the types of indexes and all of the features provided by them, you must also consider other factors. The list of things to consider should include answers to the following questions:

Question

Why is The Answer Important?

What kind of storage engine will be used?

MySQL provides multiple storage engines including, but not limited to storage engines that can guarantee ACID compliance, engines that show the exact row count in a specific database, engines that act as “black holes” in the sense that they accept data, but never store it, some engines store all of the data in memory, etc.

Two of the most popular storage engines include InnoDB and MyISAM, and the choice of storage engine will be imperative when working with any kind of index type available in MySQL. For an example, InnoDB has parameters called innodb_flush_log_at_trx_commit, innodb_buffer_pool_size, and others which can be used to either control ACID compliance or the size of the InnoDB buffer pool. Both exchange ACID for speed and increasing the buffer pool size will make the modification of indexes and data associated with them easier at the expense of other things.

MyISAM has its own key buffer size which is equivalent to the buffer pool size, but the main downside of this storage engine is that it’s now considered obsolete. For that reason, most database administrators elect to use either XtraDB (an advanced version of InnoDB developed by Percona) or InnoDB itself. If your column contains a primary key, MySQL will automatically create a clustered index named PRIMARY, but you can also create a UNIQUE INDEX yourself.

Is the my.cnf file optimized for performance?

InnoDB has a couple of parameters that are crucial for its performance and that need to be optimized to get the best out of MySQL – this information is out of scope for this article, but it will be covered in a later article in this series.

What data types and character sets will be used?

This question may sound silly at first glance, but both data types and character sets in use may become an Achilles’s heel when dealing with indexes in the future if they are set up incorrectly.

  • Character sets will become especially important when dealing with data in multiple languages. Russian speakers would benefit from the character set of latin1; general use cases should use the character set utf8mb4 instead of using utf8 as well (utf8mb4 can store 4-byte characters while utf8 only allows for 3.)
  • In regards to data types, keep in mind that one of the most frequently used data type in the world of MySQL is VARCHAR, allowing variable length characters (both number and text-based) values. In this case, mind the fact that the bigger the data type is, the more space on the disk indexes will consume too, so make sure to choose the size appropriately and choose wisely.

Also, keep in mind that MySQL comes with a couple of limitations on this front as well – one cannot put a UNIQUE INDEX on a text column, for example. Users of InnoDB should also mind the fact that the index key prefix length limit is 3072 bytes if the DYNAMIC or COMPRESSED row format is in use, while MySQL will only use 767 bytes for the REDUNDANT or COMPACT row formats.

What columns are indexed and are all of them necessary?

This question might seem very silly, but you might be surprised to see how many database administrators and software engineers index for the sake of indexing. MySQL comes with a couple of additional queries that can help you figure out whether an index is actually being used (think EXPLAIN and the like), so make sure to dive into it and learn the ins and outs of the EXPLAIN query. Once you index your columns, make sure the indexes are used by MySQL. Otherwise you will waste disk space.

Is there enough data for it to be indexed?

Remember indexes in books you’ve read? Secondary indexes in MySQL work in a similar fashion. They are essentially used to find specific column values quickly, but if you have ten rows and need to find one, you won’t go far to find it. To make sure that the indexes you’re going to use will be useful to MySQL, please make sure you have at least a couple thousand rows in a table. Applications being read-heavy help too. The more rows we have, the more effective our indexes will be.

What type of index should be used?

Lastly, consider one of the most important questions – what’s your use case? Refer to the list of indexes provided by MySQL to figure out your answer to this question, if necessary, read up on the documentation, and choose the option that is the most useful for your specific use case.

The list of questions above is not exhaustive, but it should act as a good starting point to direct your choices. After answering these questions, you should have a pretty good understanding of where your MySQL infrastructure is heading and how best to approach your data with indexes.

Once you figure out how best to index your data, please make sure to consider what issues you might be facing in the future to avoid any mishaps. These issues might not necessarily be directly related to indexes. However, if you neglect to make sure your servers are scalable when choosing a hosting provider, if you neglect to do basic research to figure out how much operating memory is necessary, if you don’t think about database normalization, or if you don’t ever do database-related research in Stack Overflow, it’s safe to say you and your database will be in line for trouble. To make sure your indexes will be as effective as possible, consider everything from the servers you are going to employ to reach your goal (make sure they have scalable resources if necessary) to the normalization of your database.

Summary

Indexes in MySQL have their nuances and most of them are related to specific kinds of indexes. No type of index is useless – all of the indexes have their use cases. However, to adequately apply them to these use cases, you must be familiar with at least some of the nuances of indexes. I hope that this article has helped you do that, and that you stay around the blog for more. See you in the next one!

The post The nuances of MySQL indexes appeared first on Simple Talk.


from Simple Talk https://ift.tt/m8yDJ91
via

A MySQL story: Can system engineers solve database issues using system tools?

I attempted to avoid a dry presentation because this is a technical subject. As a result, I reasoned, why not depict it as a story? After all, everyone enjoys stories, and we’ve all heard plenty of fancy fiction tales from our grandmothers and elders. Those who don’t want to read stories can just read the bolded words, which are entirely technical.

6:00 p.m. 8:00 p.m.

Outside, a brisk breeze blew, and the entire city had forgotten about summer in favor of the sea breeze… especially those who lived near the beach. This narrative begins near the ocean… On the top floor of one of the city’s tallest buildings, there is a spacious boardroom that seats 25 people and is completely air-conditioned. Around ten people sat on each side, while a senior person who was leading the meeting sat in the center and observed both sides. On the one side, sat members of the service provider(SP) that hosts and administers the customer’s infrastructure. On the other side sat his company’s (social networking platform) information technology and application team handles the applications and services.

A cartoon image showing several people seated at a conference table. The manager is seated at the head of the table

(All images sourced from https://www.pngegg.com/)

The plot is of this story not centered on the team senior member. Rather than that, it is built around the system engineer, who is based on the service provider side. The protagonist of the story is a service engineer we’ll call Z.

Z recalled how chilly it was outside when he initially entered the building, but how tense it was within the boardroom due to the discussion. Z began to focus on the customers who were arguing. “We did the MySQL query on the replica server’s, and it produced results promptly, therefore MySQL is operating great, and reading is also extremely fast…so there are no issues with MySQL,” a customer representative stated. He began by displaying the commands and outputs to the rest of the board room.

******************************************************************************

Select * from user LIMIT 1000;( for eg; Returning the first 1000 rows from a table user)

Show processlist; ( no issues)

******************************************************************************

Following that, one of the SP engineers presented data gathered during his testing of the customer’s infrastructure. He began by displaying the IOPS graph from the SQL lun/storage partition’s side and declaring that everything was OK, and that consumption was far below the allotted capacity. As a result, he believed that a large number of underutilized IOPS were still accessible for utilization in applications. He also performed read/write tests on the Replica SQL server’s OS level and discovered that it was operating fine. He recorded and provided documentation for the SAR data (used to collect performance data from Linux) throughout the experiment.

******************************************************************************

  • sar -u Shows CPU use
  • sar -P ALL Shows CPU usage
  • sar -r Memory usage
  • sar – S Display of memory
  • sar -b monitors overall IO activity;
  • sar -d monitors individual disk activity.

******************************************************************************

Furthermore, the lun use graph plainly showed that it was not completely utilized. Even when doing read/write tests at the operating system level, the graph shows only small spikes, suggesting that the storage bandwidth is not being used to its full potential. As a result, the storage provider claimed that this was not a storage issue, and that consumers should stay away from it completely.

*************** Utilization Reports from storage based on ****************************

  • Disk level
  • Raid level ( Redundant array of independent disks)
  • Lun level (Logical unit number)
  • Volume level
  • Processor Level
  • Cache utilization

******************************************************************************

A cartoon image showing several people watching a presentation by an engineer

A member of client-side asked, “Why don’t you configure RW (Read/Write) allocation as an 80/20 ratio, rather than the present 50/50 in the storage?”

“If even 50% of storage capacity is not fully utilized, why should we consider increasing it to 80/20 here?” asked the SP engineer. The conversation deteriorated from here into an escalating argument.

Z considered the environment in the boardroom to be quite hot. He focused on why he was currently sitting in this room and when/how/why this situation arose. To grasp this, we must slightly rewind this scenario.

Two months ago…

A cartoon image showing a man happy about some news

“It’s really a huge milestone for our business. We will be migrating and hosting a Client from one of the Big Cloud Providers to our managed hosting services. If we successfully complete it then, we can get huge orders in the future!” exclaimed the head of the company where Z worked. The entire company was happy about this new deal. The agreement mentioned managing only customer infrastructure and OS. Applications would be handled by the customer’s IT and application teams. Thus, all departments within Z’s firm were involved, including sales, marketing, accounting, solution architecture, engineering, provisioning, and project management. The company began acquiring and deploying hardware, internet circuits, and operating systems. The SP procured high-end servers, storage, and networking equipment from prominent industry manufacturers for this customer.

Once all necessary hardware and operating systems were obtained and installed, the servers were handed over to the customer’s application development team for application deployment.

AN- Before I begin, I’d like to clarify the types of services offered by providers.

Datacenter Hosting provider: Customers can purchase all or a portion of the rack space on which their servers, appliances, or network devices are placed. The total cost of ownership (TCO) and all capital expenditures (CAPEX) are included (one time).

Managed hosting service: the provider will acquire the appropriate hardware and host the clients’ operating systems and applications in its data center. Customers are required to sign a contract committing them to the service for a period of at least three or four years. The penalty is based on a violation of the service’s terms of service. Although there is no TCO, the model is based on OPEX. Monthly subscription payments that cover the cost of the service and associated equipment

Cloud hosting Service: Pay-per-use enables you to pay only for the resource/service based on usage. There is no TCO or Capex, Only OPEX – Monthly. Nowadays, cloud service providers provide attractive pricing structures in exchange for a long-term commitment.

Present-day evening

Z had to go for the evening, so he finished all his work and packed his laptop. A company Top level manager immediately phoned him and demanded to meet. Z got up from his seat, and, on the way, he thought that the Top level manager would ask some technical doubt or compatibility details about new requirements.

Alas, when he entered his Office, he was met with a serious-faced Top level manager. The Top level manager said, “Z, I’m glad you are here; we need your help, and we hope you can solve this problem.”

An image showing a seated man with his head in his hands

Z was nervous at this point, unsure how he could resolve the issue without first determining what the issue was.

“What is going on?” Z questioned.

“Are you aware that we received a significant order a few days ago for social networking company hosting and management?” the Top level manager inquired.

“Yes, we implemented the hardware and operating system and handed it over to the customer for application deployment,” Z stated with a nod.

The customer is having replication issues with MySQL; the database contains terabytes of data that was downloaded from their cloud provider and imported into the Master MySQL node, but replication to other replica nodes is not occurring at the desired rate. They initially suspected the network, but our network experts conducted an analysis and detected no faults, proving that the network is running as expected. Now the customer is claiming that the replication nodes lun/mount point is causing the issues. No one has addressed this issue, and it has been dragging on for two days. If this issue is not resolved, then the customer will continue to use their existing cloud provider for some time longer; thus, we may incur a loss not only in terms of not utilizing the new hardware and services, but it also affects our credibility.

Z shook his head in recognition of the gravity of the issue and remarked, “I’ll inform my manager and then go.”

“It was already agreed upon with your boss, so please inform him and look after the customer. Also notify me of any changes” the business leader grinned.

Z notified his boss and traveled to the Customer’s site to meet with their IT and application development teams. Z had to visit the customer with all customer-facing staff, including business managers, account managers, TAMs, and sales reps, as well as technical heads and engineers due to the scale of the order. As a result, a party of about ten individuals set out to visit a customer location. True, the bulk of corporate customer meetings will have only one or two engineers; the balance will be comprised of management.

Later that evening, 8:30 p.m.

Z found himself in the meeting room where the never-ending conflict occured. Z understood the Customer’s point of view and knew they were speaking from the facts they have acquired, but the SP engineers have also presented adequate data to establish that their infrastructure was in good condition. This does not, however, answer the customer’s issue because it demonstrates that replication occurs very slowly in all Secondary Replicas.

Z made an important point here: the customer are shifting from cloud to managed hosting services, which implied that the customer’s infrastructure components such as hardware, network, security, and storage operating system are all controlled by a service provider. Obviously, customer-side system administrators/information technology workers lacked full privileged access to the operating system, leading them to assume they are insecure, and the SP cannot expect full support from them until they understand the managed hosing service benefits. As a result, Z began searching the group for members of the DB team and identified one man. He smiled at him and was greeted with a pleasant smile in return. Z decided that he would be the one to support him moving ahead with this quest.

Z began conversing with everyone and expressed his appreciation for their assistance in supplying vital information that would enable him to work on that issue. Z was aware that there is a MySQL problem, but he continued to declare during the meeting that he will work on the storage and operating system sides. Nonetheless, he sought assistance from one MySQL member on the client team in the event of a necessity.

As a result, the client’s senior person assigned one of his MySQL engineers to assist Z, the same person who was smiling at him by happenstance. The database engineer, V, took Z to the cafeteria and gave him coffee. “Managing a MySQL database is a challenging task, and you are absolutely remarkable,” Z commented. V grinned in response to the compliment, because he was responsible for the management of multiple terabytes of MySQL data.

Z began collaborating with V on the operating system for the Replication servers. He explained the method to V while he worked on it. “There is no harm in being acquainted with system tools,” Z asserted.

An image showing two men at a desk. One is using a computer

He began by checking the system’s essential statistics using the SAR (System Activity Report).

**** Yum install sysstat ***This will aid with the SAR installation, in case it doesn’t exist.

He instantly began writing enormous files to the SQL Lun/Data partition, despite the fact that all system parameters appeared to be OK.

dd is a powerful and useful utility to convert and copy files, that comes pre-installed on Unix and Unix-like operating systems.

******************************************************************************

dd <if=source> of=destination>

dd if = /dev/sda of = /dev/sdb

******************************************************************************

Even later that evening: 11pm

Everything was operating normally, and they had not noticed any issues. As the night wore on, the strain on Z’s shoulder became more intense. V was really cooperative, yet he refused to accept that MySQL could be the culprit. He showed Z the identical query output, but the issue remained unresolved.

Z stepped out of the room and sat on a sofa, while analyzing the problem’s nature.

Storage is a monster that is still in development and underutilized, therefore, it will not be a problem. The MySQL servers are running normally, and no issues have been detected. He realized that if they did not address this issue soon, the firm may incur a loss as a result of the client failing to utilize the service on time, and the customer will most likely have to download a huge quantity of SQL database from the cloud provider again.

An image of a man thinking about how to solve a problem

He thought “Oh my god, why am I debugging like other engineers?”

Z wondered why his company sent him here. Think, think, think, think outside the box. Suddenly, something clicked in Z’s head: he knew what to test, but he took a step back and decided not to inform the database engineer about the problem now.

Z logged in and began working on the Database SQL servers at the operating system level; despite his competence with MySQL administration, he lacks access to client MySQL servers.

Z’s face lit up, and his eyes glowed now that he had a thought. “How did you spend your time outside?” V questioned, a smile on his face. “You seem to be positively bursting with vigor!” Z logged into Mysql Server and immediately began working with the Linux command-line tool strace.

“strace -p 3456 “ ( process id of mysql)

It began by displaying Fcntl, write, lseek, write, pread, and read… everything is rather slow due to the data being read line by line…

*******************example output –not real capture*******************************

9260 lseek(22, 0, SEEK_SET) = 0

9260 write(22, “15\xxxxxxxx.002936\n621015866\n173″…, 84) = 84

9260 read(9, 0x1d1a34b0, 16384) = -1 EAGAIN (Resource temporarily unavailable)

9260 fcntl(9, F_SETFL, O_RDWR) = 0

9260 read(9, <unfinished …>

9261 <… pread resumed> “\2\226\0\0\0\0\0\0\0\0\0\0\0\0\0\0\0\0\0\0\3\25\221<\0\0\0\0\0\0\0\0″…, 1024, 156095488) = 1024

9261 pread(181,”\2\251\0\0\0\3\25\224\320\0\0\0\3\25\225\f\0\0\0\3\25\225H\0\0\0\3\25\225t\0 0″…, 1024, 156102656) = 1024

9261 pread(181, “\2\251\0\0\0\3\25\214d\0\0\0\3\25\214\220\0\0\0\3\25\214\314\0\0\0\3\25\214\370\0\0″…, 1024, 156103680) = 1024

9261 pread(181, <unfinished …>

******************************************************************************

Z had now identified the root cause of the problem, which he had seen before with MySQL infrastructure. Even though he was confident about the MYSQL issue, Z simply phoned his mentor, a very senior socket level C programmer, and informed him of all he discovered. Z’s mentor confirmed that Z was right.

An image of two men at a desk. One is writing while the other explains something

With that information, Z informed V about the problem in MySQL. V didn’t admit it and said the same thing about how the problem was in MySQL. But now Z said the issue is not in your replica Server .. issue is with your Primary SQL server. V appeared taken aback and inquired, “How could you know, considering that you did not have access to SQL?”

Z began by displaying the output of the strace and describing each step in detail, including the delay associated with data reading.

“What does it mean when it indicates that the reading is slow?” V was perplexed. “When I query master, it appears as though everything is in order.”

Z explained to him that while there is no delay when querying the master with a limited number of records, there is a delay when attempting to read a record from a corrupted area.

Finally, at Z’s request, V agreed to repair the Master SQL table.

MySQL Repair can be done in multiple ways.

****************************************************************************

  1. Using mysqlscheck :

mysqlcheck -u<USERNAME> -p<PASSWORD> –databases <DB-NAME>

  1. Manual Repair inside database

Login to mysql and then execute “ REPAIR TABLE TABALENAME [OPTIONS]

  1. Using myisamchk for myisam Tables

Run myisamchk ‘–recover’option to recover MyISAM table – default option.

  • myisamchk –recover tablename

Run myisamchk –safe-recover option is slower than the default recovery option

  • myisamchk –safe-recover tablename

**************************************************************************

After the MySQL master table repair, database replication from Primary to Secondaries occurred at a rapid pace, showing that they were now fully utilizing their managed storage provider’s beast storage and network performance.

Once V had validated, the replication process took between 3 and 5 hours if the sync occured in this manner.

Even though it was after 12:30 a.m., Z called his Top level manager and manager to update them on the issue.

V also contacted his boss to inform him of the wonderful news.

Everyone was satisfied and returned home with a joyful disposition.

An image showing a happy man in a suit

For addressing this challenge, Z received an award from his firm.

Z’s learnings from the issue :

*****************************************************************************

1. When importing/exporting Mysql databases from a Cloud provider, always follow their best practices to avoid issues.

2. As service providers, we must continually remind ourselves that the consumer is always correct; even if something is erroneous, we must provide sufficient proof and justification to persuade and educate them.

3. Rather than attempting to remedy the problem’s impact, try to find the problem’s root cause.

******************************************************************************


The post A MySQL story: Can system engineers solve database issues using system tools? appeared first on Simple Talk.


from Simple Talk https://ift.tt/NuGFADj
via

A day without meetings

Back when it was more difficult to work from home due to bandwidth, I would often head into the office to work for several hours on some weekends and bank holidays like President’s Day. I was a database administrator and was always involved with many projects, but what would make me give up my well-deserved time off? Unfortunately, that was one strategy I had to get caught up on some tasks without interruptions like meetings and more requests.

Meetings can be critical for communication in organizations, but there are so many, and they often overlap. I remember one particular day back at my DBA job when we were starting on a gigantic project. The kickoff meeting was followed by several other related back-to-back meetings filling most of the day. The bad thing was that everyone involved in the project was expected to attend every meeting even when it didn’t apply to them. At one point, there was a 15-minute break. When we returned to the conference room, the project manager started asking us how many tasks assigned that day were we able to complete!

Most of my meetings at Redgate tend to land Tuesday to Thursday mornings. The early meeting time is to accommodate both UK and US folks. The nice thing is that many Mondays and Fridays have very few meetings, so I tend to get more done on those days.

Recently, former Redgater Kendra Little tweeted that her job had a “no meeting Friday” policy. She was happy that she could get so much done on Fridays without being interrupted. I had been thinking about this idea for a couple of weeks before I saw Kendra’s tweet and had no idea it was actually done at any organization.

Even if there are very few meetings on certain days, there is still Slack communication and emails. I may have a plan for what I want to accomplish on a particular day, but I will often get sidetracked with other requests.

Redgate has a collaborative culture, and I would never want to change that, but I would love to see a day where we could pretend we are not at work. It would be fun to see a to-do list shrink one day a week instead of growing larger. Some teams need to be available all the time, but wouldn’t it be great to have one day a week with no email, Slack, or meetings?

Commentary Competition

Enjoyed the topic? Have a relevant anecdote? Disagree with the author? Leave your two cents on this post in the comments below, and our favourite response will win a $50 Amazon gift card. The competition closes two weeks from the date of publication, and the winner will be announced in the next Simple Talk newsletter.

The post A day without meetings appeared first on Simple Talk.


from Simple Talk https://ift.tt/gzQxrVP
via
Tuesday, April 19, 2022

How to automate table level refresh in Power BI

The refresh schedule on the Power BI portal is made at the Dataset level. This means all the tables refresh on the same schedule. Some models may not have a problem with this, but many models will. This article explains how to automate table level refresh in Power BI.

This refresh schedule means you will be creating a bigger workload than you really need compared to a refresh at the table level if it were possible.

There are some options to ignore and work-around this, and there is one option which will require more effort but can solve the problem. This article will analyse these options and go deeper into how to build custom refresh automation solutions.

In this article, I will also refer to many solutions previously published in other blog posts and explain where they fit when trying to solve big problems. Some you may already know; others will be completely new for you. Be prepared for a long journey of new knowledge which may change your point of view about managing Power BI refreshes.

Why customize Power BI refresh

Here are some reasons to customize the refresh in Power BI:

  • Schedule the refresh on table level according to the frequency each table needs
  • Go beyond the refresh schedule limit in Power BI
  • Create refreshes by partitions. This is especially important when using incremental refresh. (This will be a subject for a different article.)

Ignore the refresh frequency problem

In many scenarios, scheduling all refreshes at once will not be a big deal. The tables which could live with a less frequent refresh schedule are probably small dimension tables, and the workload created by their refresh is not that big.

That’s why in many scenarios it’s safe to ignore this problem; it’s not a completely wrong option.

Use dataflows to break down the ETL process

One solution is to use dataflows to break down the tables according to their refresh needs. Each dataflow can have its own refresh schedule, solving the workload problem at the data source.

One single dataset can load the data from multiple dataflows. However, each table in the dataset will need to have its own storage mode. The solution is to use import storage mode on all the tables coming from the dataflow.

The bad side: This means the data will be duplicated, on the dataflows and on the datasets. You will also have many refresh schedules to deal with, one for each dataflow, what was expected, and one for the dataset.

The good side: On the other hand, the workload to the data source will be very precisely configured according to the needs. There will be a second workload, but it will be inside Power BI, between the dataset and dataflows, so it will be less critical.

You may be wondering why not to use Direct Query. It’s simple: Performance. The relationships between tables using import mode will result in better performance for the queries than using direct query mode.

The solution

There is no way to refresh one single table from the UI, but you can refresh a single table or even a single partition using the XMLA (XML for Analysis) connection to Power BI. The XMLA connection is a Power BI connection endpoint, open to any developer who would like to build a tool and connect to it. Microsoft allow connecting to the XMLA endpoint using SQL Server Management Studio (SSMS) You can also connect to the XMLA endpoint using the Tabular Editor.

Both tools can refresh individual objects interactively. They can also generate scripts for the refresh. However, they can’t schedule the refresh, it’s always an interactive task.

You can schedule a recurring execution of the generated script. In order to do so, use an Azure Automation Account. Using the Automation Account allows scheduling a PowerShell script to connect to Power BI and refresh the table.

The Power BI connection is made by using an identity from the same tenant. You will need to register an application to provide us with this identity.

Generating the refresh script

The first step is to generate the refresh script, or just copy it from below. Here are the steps to generate the refresh script.

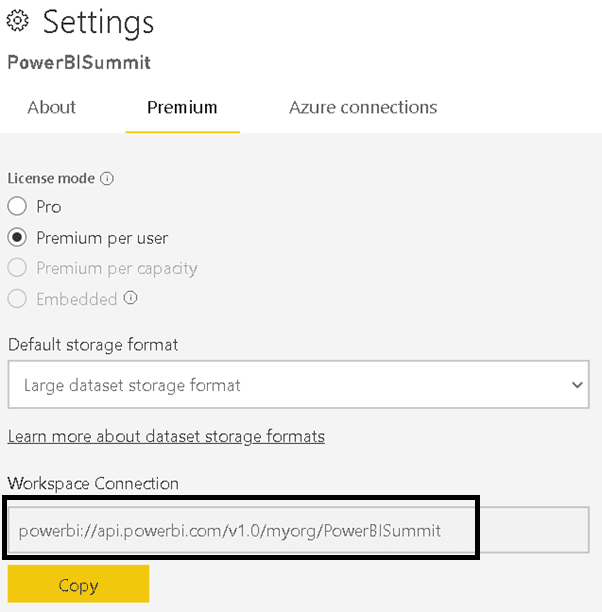
  1. On the Power BI Portal, navigate to a workspace and open Workspace Settings.
  2. Select Premium

The XMLA endpoint is only available on PPU or Premium subscriptions

Image showing the workspace settings. The Workspace Connection is highlighted

  1. Copy the XMLA endpoint address (Workspace Connection in the dialog)
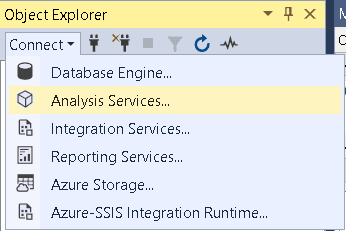
  2. Open SSMS
  3. In Object Explorer window, select Connect-> Analysis services

It’s possible you don’t need to do that, if the Connect to Server window is already open. Only change the Server type to Analysis Services

An image showing the Object Explorer of SSMS. Analysis Services is selected under Connect

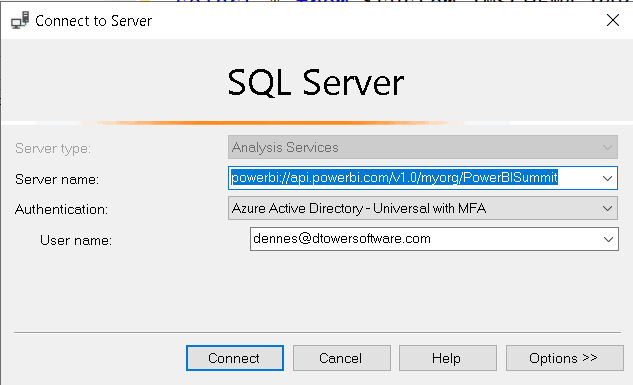
  1. Paste the XMLA endpoint as the server’s name
  2. Choose Azure Active Directory – Universal with MFA authentication

An image showing SSMS connecting to the Power BI workspace

  1. Type the e-mail of your Power BI login
  2. Click the Connect button. You will be requested to authenticate
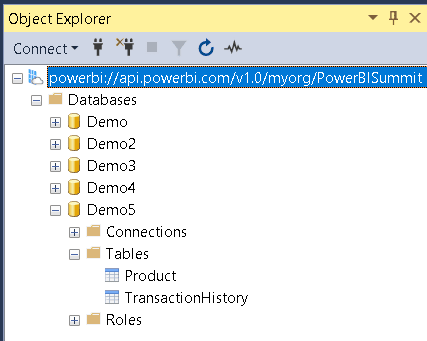
  3. On object explorer window, open the database. Each dataset on the workspace will appear as a different database.

An image showing the Object Explorer and connected to Power BI. The Demo 5 database is selected and shows two tables

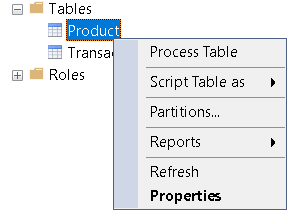
  1. Right click the table you would like to refresh
  2. Select the Process Table menu option

An image showing Product is selected and the right-click menu

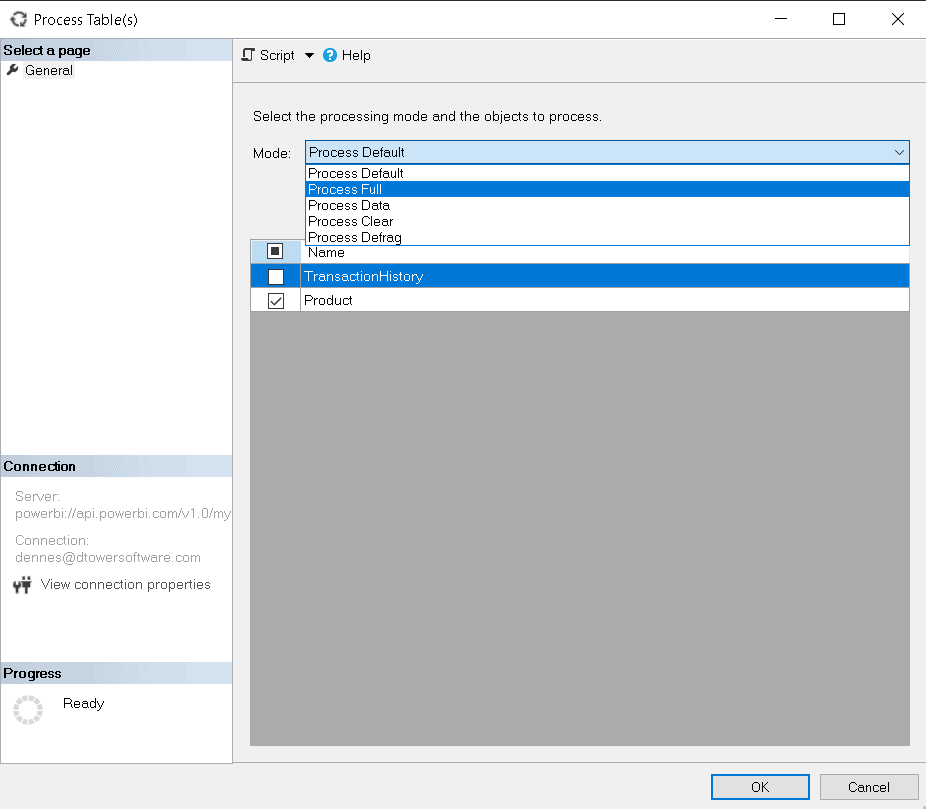
  1. On the Mode drop down, select the Process Full mode

There are many different modes you can use for different scenarios. You can check additional details here.

An image showing the Process Table(s) dialog. Process Full is selected. The Product table is checked.

  1. Select the table you would like to process. It’s interesting to notice you can choose multiple tables and create one single script to process multiple tables together, if they need the same refresh frequency.
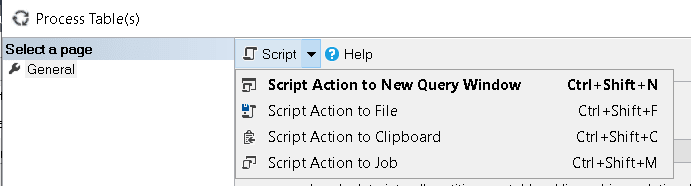
  1. Using the Script button, select Script Action to a New Query Window

An image showing the Process Table(s) dialog. The Script menu shows Script Action to New Query Window

  1. Click the Cancel button. You don’t need to process it interactively.

A script like the one below will be generated:

{
  "refresh": {
    "type": "full",
    "objects": [
      {
        "database": "Demo5",
        "table": "Product"
      }
    ]
  }
}

You may notice it’s not XML, it’s JSON. XMLA processing can accept JSON format as well.

Side Option: Interactive refresh using the Tabular Model

An alternate option for this situation, although it doesn’t meet the goal for in this article, is to use the Tabular Editor to generate and execute scripts.

Tabular Editor can generate XMLA scripts but can’t execute them. On the other hand, it can generate C# scripts using TOM (Tabular Object Model) and execute the script.

There are three interesting references about this:

  • This article explains how to generate scripts to make multiple updates in batch using the Tabular Editor.
  • This article explains an application created to be executed inside the Tabular Editor which helps to easily generate the refresh scripts.
  • This video summarizes many options about interactively refreshing tables using Tabular Editor.

These are interesting options, but in this article, I will proceed with the automation of a PowerShell script.

Generating an identity for authentication

The PowerShell script will need an identity to authenticate to Power BI. You create this identity using Azure AD, and you will need to register an application in Azure AD.

There is another blog post explaining how to do it in detail for Power BI, so I will leave you with this link.

Installing the ADOMD library

PowerShell is the script language I will use for this example. However, this is not enough. You need to use a client library to connect to the XMLA endpoint. Some examples are ADOMD, AMO or TOM.

I will illustrate the example with ADOMD. It’s enough to execute a XMLA script and I believe it will be more familiar to most developers, since it uses the ADO model (Connection/Command).

You can learn more about these client libraries on the following links:

This script used in this example requires the ADOMD Library, and the library must be installed from the machine where it will run. In this case, you will test it locally before scheduling it with the Automation Account.

You can access the link and use the installer for the library; it will be enough for a local execution.

The configuration for the ADOMD library to be used in an Automation Account will require some additional steps. I will talk about this further in this article.

Creating the PowerShell script for the refresh

Below you can find the complete PowerShell script you can execute using the PowerShell ISE. Here are some details of this script:

  • The connection string contains the XMLA endpoint for the workspace, but it also contains an initial catalog. The Initial Catalog contains the name of a dataset. Each dataset on the workspace behaves as a database and you will be connecting to one specific dataset.
  • The service principal (using its format: AppId@TenantId) is included in the connection string as the username, and the password is the secret value.
  • ADOMD contains the traditional ADO objects: Connection/Command/Adapter/DataReader. For this example, Connection and Command are enough.
  • The script uses Command’s ExecuteNonQuery method. This method is used when you want to execute something, but you don’t want to bring any information back.
  • The script opens the connection at the last possible moment and closes it as soon as possible. This is old school good practice.
  • The script calls the Connection’s Dispose method, a good practice used with .NET objects.

This is the PowerShell script. You can copy/paste it in PowerShell ISE and execute, and it should work after you modify it for your environment.

[System.Reflection.Assembly]::LoadWithPartialName("Microsoft.AnalysisServices.AdomdClient") 
$PowerBIEndpoint = "powerbi://api.powerbi.com/v1.0/myorg/PowerBISummit;initial catalog=Demo5"
$ServicePrincipal = "app:f10213a0-a879-4a76-8bc1-2570edc4c8a8@47a64ce3-3ebb-4b1a-920c-575f9b892069"
$ServicePrincipalSecret = "<<your app service secret>>" 
$Query = "{
  ""refresh"": {
    ""type"": ""automatic"",
    ""objects"": [
      {
        ""database"": ""Demo5"",
        ""table"": ""Product""
      }
    ]
  }
}" 
$Connection = New-Object Microsoft.AnalysisServices.AdomdClient.AdomdConnection
$Connection.ConnectionString = "Datasource="+ $PowerBIEndpoint +";User ID="+ $ServicePrincipal +";Password="+ $ServicePrincipalSecret  
        $Command = $Connection.CreateCommand();
        $Command.CommandTimeout = 20000;
        $Command.CommandType = [System.Data.CommandType]::Text;
        $Command.CommandText = $Query;
$Connection.Open()
$Command.ExecuteNonQuery()
$Connection.Close()
$Connection.Dispose()

Checking the results

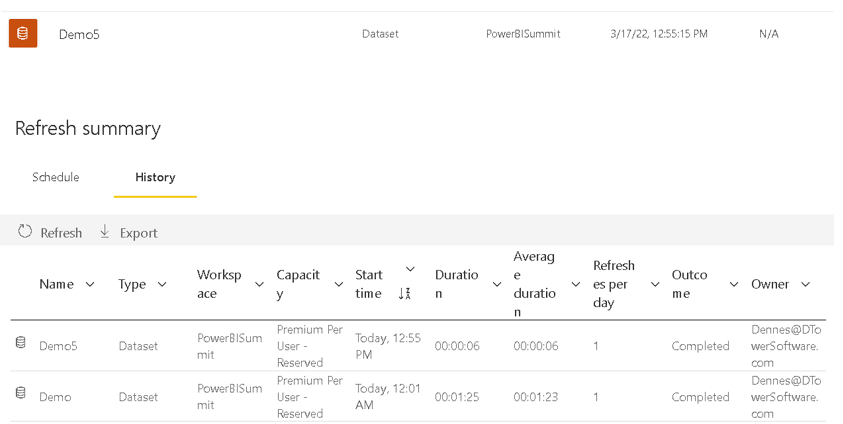
In the Power BI portal, the refresh will appear as if it was a dataset refresh. It will appear as the last refresh date of the dataset. This happens even if you open the Refresh Summary on the Admin Portal page. The view is always by dataset.


An image showing the Refresh Summary for Demo5. The data was refreshed Today, 12:55 pm and 12:01 pm

Power BI has the information about the last refresh date, but you need to extract the information through the XMLA endpoint. You can do that using SSMS.

There are two ways to get this information:

  • Checking the table properties in SSMS. SSMS brings the last refresh date. You can check this on both tables, and you will see the date will be different, because the refresh was done only in a single table
  • Querying the system tables. Power BI behaves as an SSAS server, and it also has system tables. There are limitations about what data can be retrieved, but they are very useful.

Querying Power BI System Tables

The queries to system tables can be built in the MDX window, but they are neither MDX nor SQL. They are in fact another syntax called DMX. You can think about it as a simplified SQL which doesn’t support JOIN, GROUP BY and more.

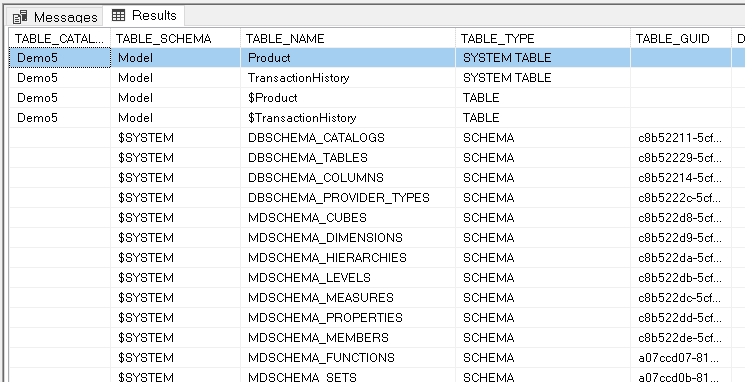
You can start with a simple select to show all the tables, including system tables:

SELECT * FROM $System.DBSchema_Tables

An image showing the results of the query. There are 2 system tables for Product and TransactionHistory and two for the TABLE objects

The secret to finding the information is how the refresh happens. The refresh is always executed by partition. Power BI doesn’t care if you request by dataset or table, the execution will always be on the partition level.

You can query the table $system.TMSCHEMA_TABLES to get the Id of the table, but the last refresh date is only located in the table $system.TMSCHEMA_PARTITIONS . You can retrieve this information with the following query:

select TableID,[Name],RefreshedTime 
from $system.TMSCHEMA_PARTITIONS
where TableID=921

An image showing the refresh date and time for the Product table

The older folks may still remember what DMX means: Data Mining Extensions. It’s an old language created to be used with the data mining feature in SSAS. I confess I thought this feature was long gone, but it was only deprecated in SQL Server 2017. It’s very curious that the language originally built to query data mining models is now used to query Power BI System tables.

One more way to capture the refresh activity

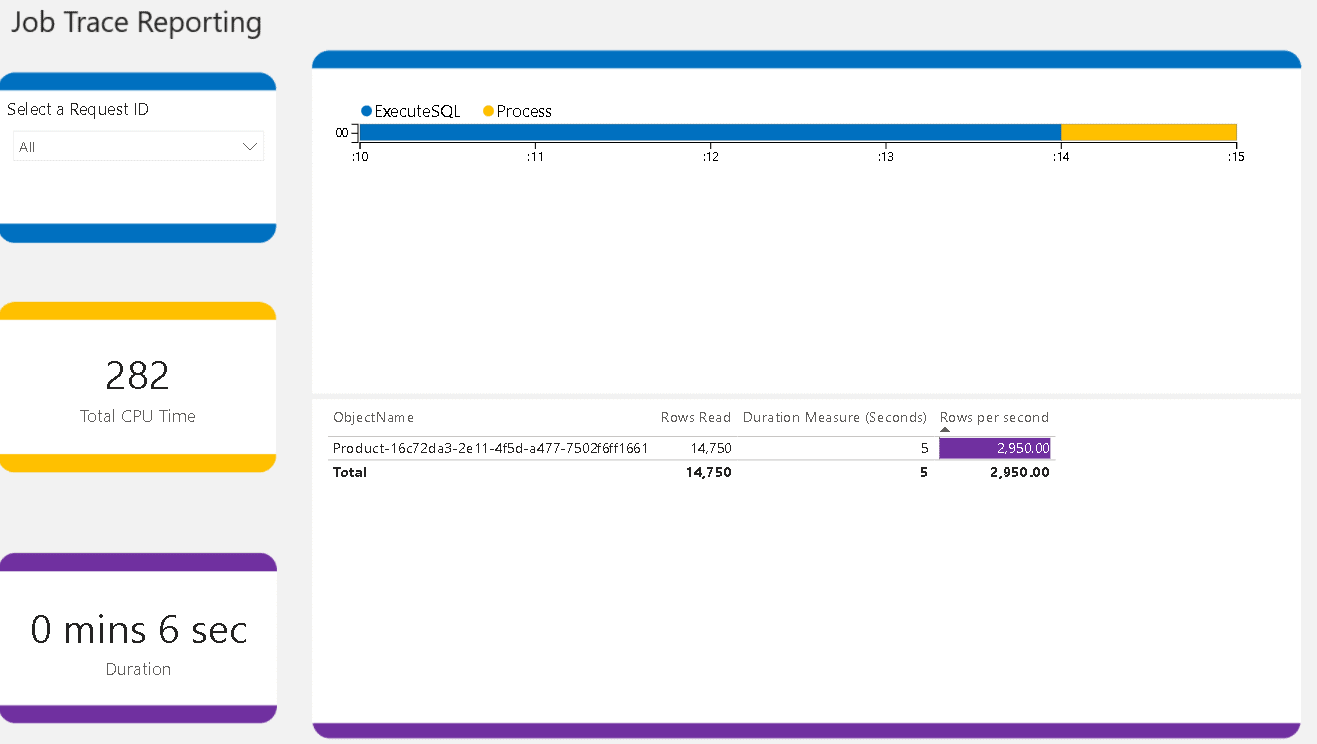
Another interesting way to view the refreshes is by capturing the refresh activity using SQL Server Profiler and checking the details of the activity using a Power BI Dashboard.

A dashboard for this purpose already exists and it’s very interesting. It depends on the captured data from SQL Profiler. Because of that, it’s a tool to be used for short tests, not to analyse production activity.

You can check the details about this dashboard and step by step about how to capture the information and use the dashboard.

I executed this test as well. The image below is the dashboard generated from the captured trace after the execution of the script. As you may notice, it shows only the product table, the only one included in the refresh.

An image of the Job Tracing Report

Automating the refresh

After building and testing the script for the refresh, it’s time to automate the execution of the script. The first step is creating an automation account in Azure.

Create an automation account

If you already have an automation account or have already worked with one before, you can skip this part of the article.

Here’s how to make a small step-by-step to provision the automation account that will be used to schedule the refresh of the tables:

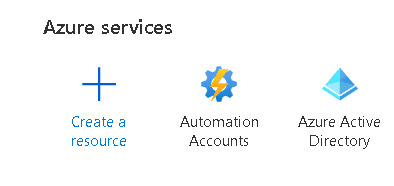
  1. In the Azure Portal, click Create a Resource icon

An image showing Azure Services Create a Resource

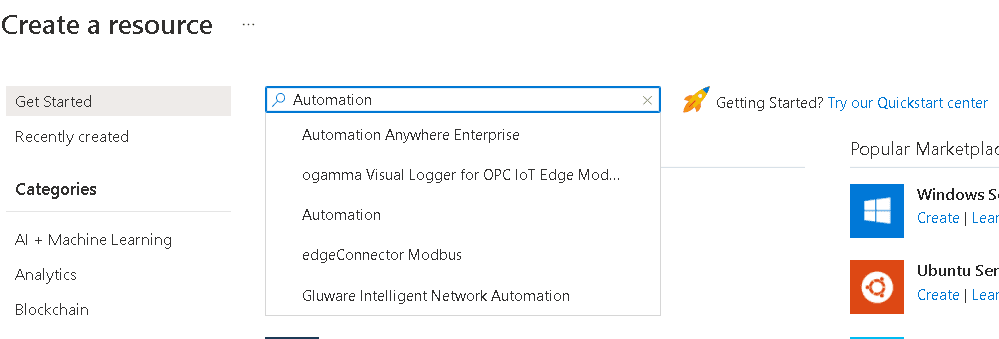
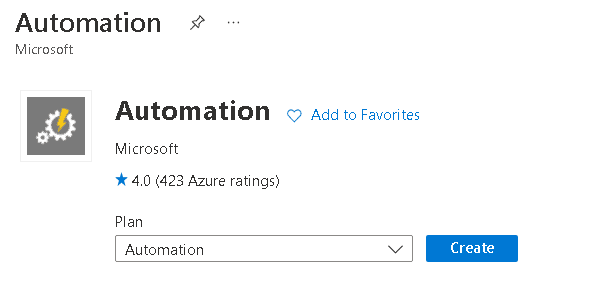
  1. In the search text box, type Automation to find the automation account

An image showing Azure Portal and searching for Automation

  1. On the Automation provisioning page, click the button Create

An image showing Automaton Create

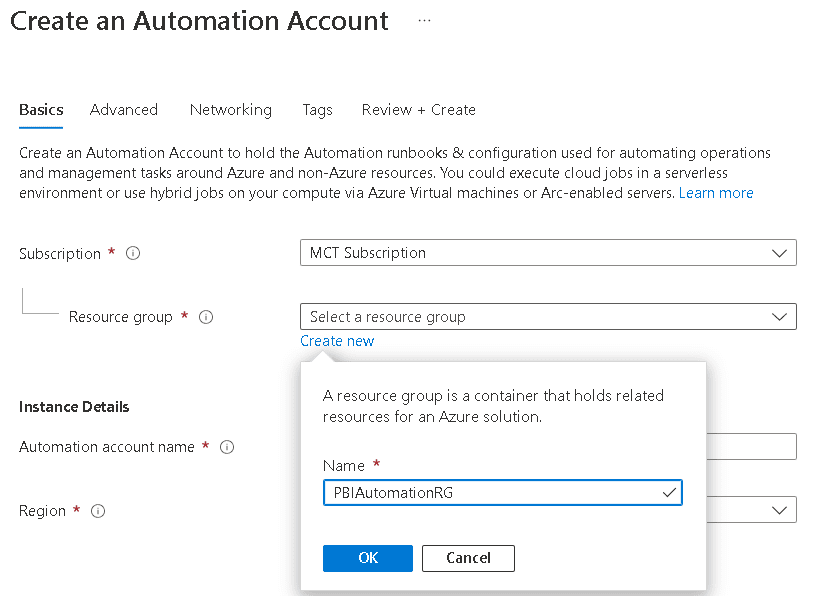
  1. On the Create an Automation Account page, click the Create New button below the Resource Group text box.

Create a new resource group called PBIAutomationRG for the new Automation account.

An image showing the properties when creating an automation account

  1. Select the region closer to you
  2. Click Review + Create button. For this example, you don’t need to customize the additional configurations in Advance or Networking.
  3. In the review window, click the Create button

That’s it, the Automation Account is created.

Configuring the Automation Account to use ADOMD

After provisioning the Automation Account, it’s time to configure it to support the ADOMD library. This is done by managing the modules imported on the Automation Account.

There is another blog post explaining how to use AMO and ADOMD in an Automation Runbook. The post has all the details you will need. It’s interesting that AMO already has a PowerShell module for it, but ADOMD doesn’t, so this post shows both scenarios, using an existing module from the gallery or including a new module uploading a zip file containing the DLL. https://sqlitybi.com/how-to-use-amo-and-adomd-in-azure-powershell-runbooks/

Creating an Automation Runbook

Here are the steps to create and test the automation runbook. –

  1. Open your automation account.
  2. In the runbooks blade, click the button Create Runbook

An image showing the Runbooks blade of the automation account. Create a runbook

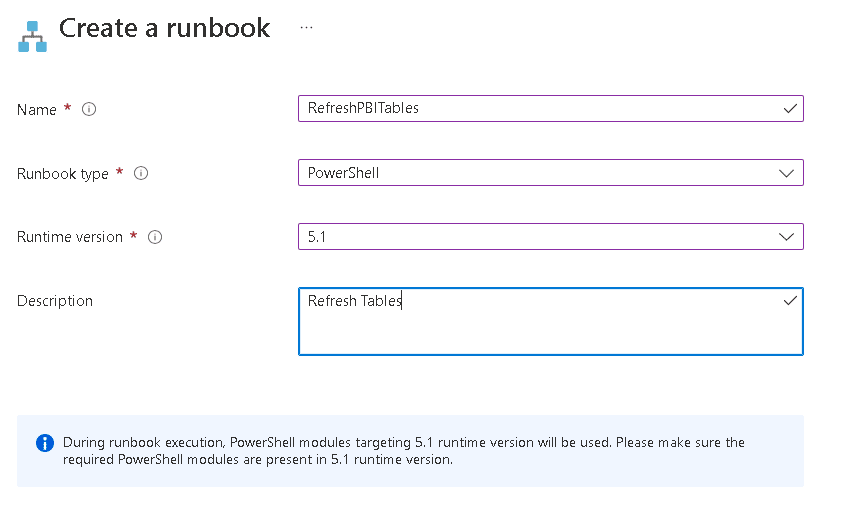
  1. Fill the runbook information. You will use a PowerShell 5.1 runbook.

An image showing the Create a runbook pages with properties filled in

  1. Click Create
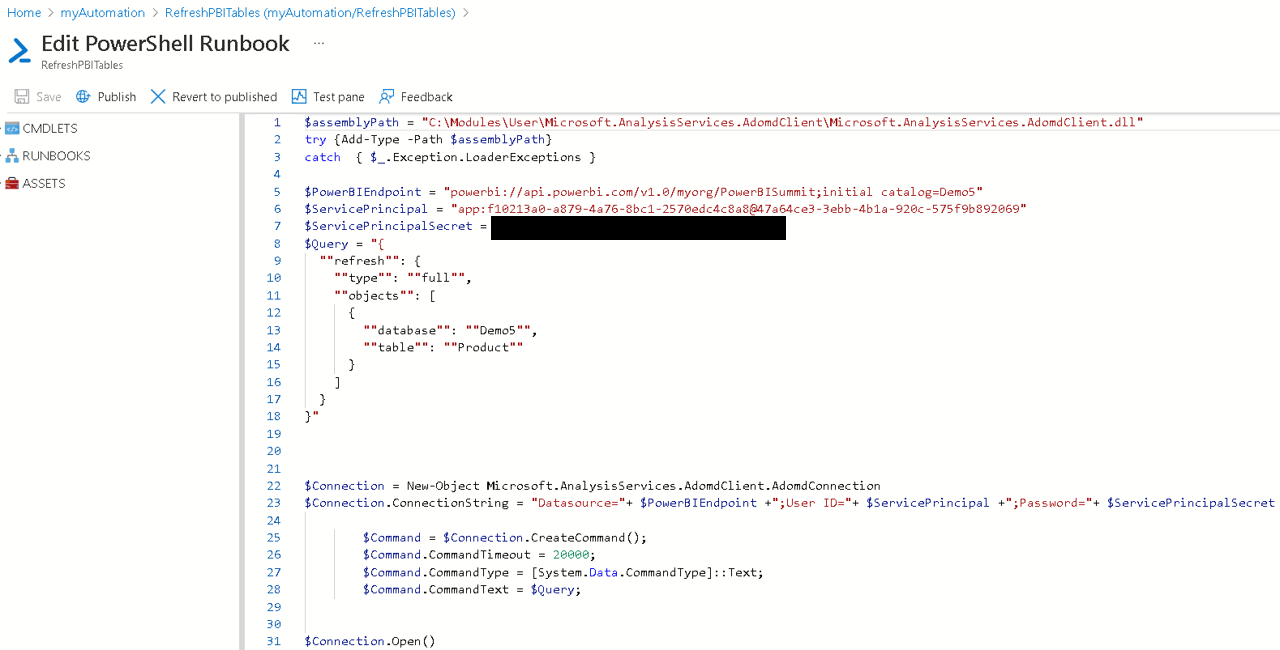
  2. In the Edit PowerShell Runbook window, paste the code you built before and executed in the PowerShell ISE
  3. Replace the first line, which is loading the ADOMD module, by the following lines:
$assemblyPath = "C:\Modules\User\Microsoft.AnalysisServices.AdomdClient\Microsoft.AnalysisServices.AdomdClient.dll"
try {Add-Type -Path $assemblyPath}
catch  { $_.Exception.LoaderExceptions }

An image showing how to edit the PowerShell Runbook code

  1. Click the Save button
  2. Click the Publish button
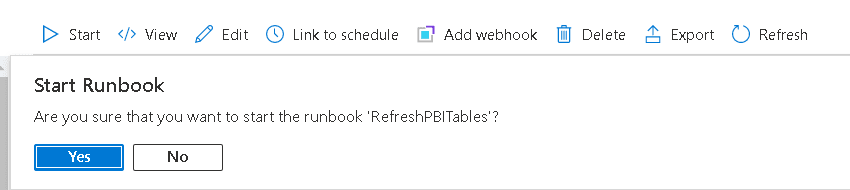
  3. On the Runbook page, click Start button and confirm, clicking Yes on the question

Every time you execute a Runbook, a job is created. You will be automatically taken to the job window.

An image showing where to start the Runbook.

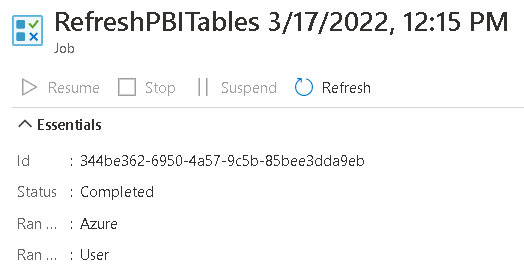
  1. On the Job window, wait until the job is completed

An image showing the status of the job

  1. Check if the refresh was successful. You can use SSMS for a precise information and look in the portal to confirm the information in the portal as well.

Scheduling the runbook execution

The runbook is created. Now it’s time to schedule it for an automatic execution

  1. On the Jobs window, on the breadcrumbs, click the name of the Runbook, returning to the Runbook window.
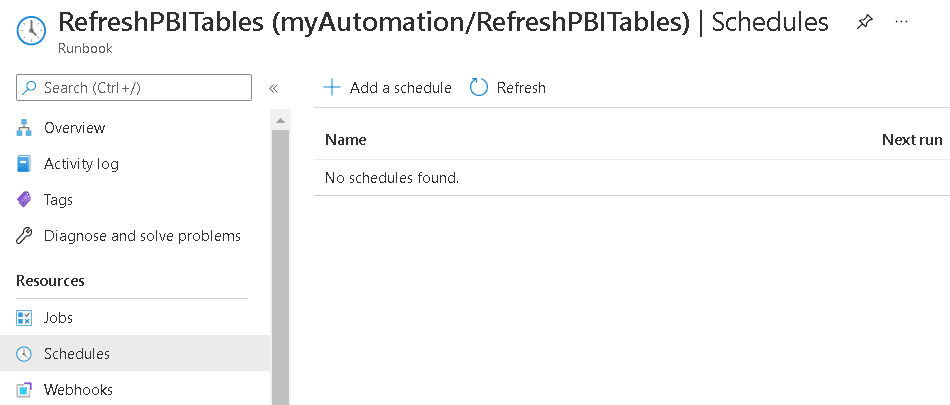
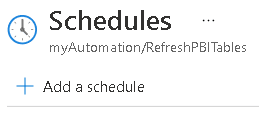
  2. On the schedule blade, click the Add a schedule button

An image showing the Schedules blade where you Add a Schedule

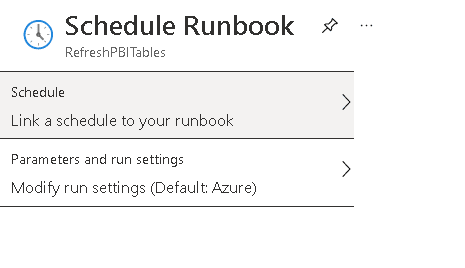
  1. On the Schedule Runbook window, click the option Link a schedule to your runbook

An image showing where to link the run book to the schedule

  1. On the Schedules window, click the Add a Schedule button

AN image showing Add a schedule

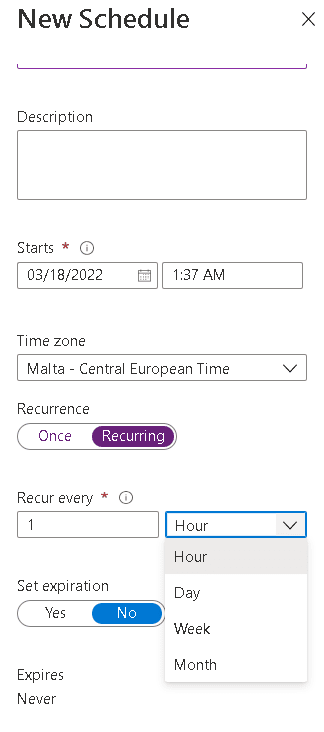
  1. Define the schedule as you wish and click the Create button

An image showing the properties of the new schedule

  1. Click the Ok button on the Schedule Runbook window

The schedule object is linked with the Runbook, but it’s stored in the automation account. This makes the same schedule available for many different runbooks, another advantage of the automation account.

Automate Power BI table refresh

You may just have discovered an entire new point of view about how to manage a Power BI data refresh. This is just the beginning. The possibilities in relation to automation only increase from this point forward.

If you liked this article, you might also like Power BI: ETL or not ETL, that’s the question

The post How to automate table level refresh in Power BI appeared first on Simple Talk.


from Simple Talk https://ift.tt/qU7bFxe
via
Monday, April 18, 2022

Azure Blueprints: Defining the order of artifacts deployment

Blueprints are (or should be) an important feature for Azure Cloud provisioning.

Probably you already know about ARM templates. We can say they are the basic notation for deployment in Azure. But what happens when we need to deploy multiple items at once? Here are some options:

  • Build everything in a single ARM template, what will make them difficult to read and re-use
  • Build each item in a different ARM template and use a new one to link all the individual files. The syntax isn’t much straightforward
  • Use a Terraform template to link the ARM template in a single deployment. Many people would say this is an anti-pattern. I don’t agree, but this is a subject for another time.
  • Use Blueprint visual Ui to link many ARM templates in a single re-usable blueprint.

This list talks by itself, illustrating how Blueprints are one of the easiest option to organize a deployments, as easier as Terraform, but with a UI to make things easier. However, there are some important tricks you need to be aware about.

Let’s review some basic concepts and jump into the important details you need to know

Blueprints basic concepts

Let’s analyse 3 basic concepts of the blueprints:

  • The artifacts supported
  • Versioning
  • Link to the deployment

Artifacts

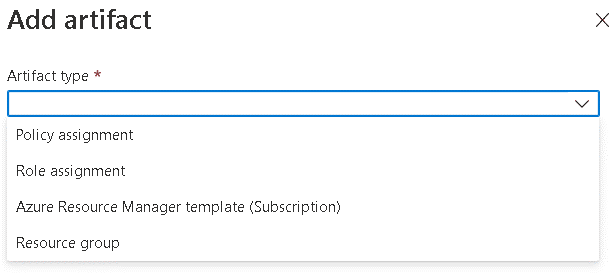
The blueprints can make the deployment of the following artifacts:

  • A resource group, to organize the items we are deploying
  • Policy Assignment, to control the governance of the environment
  • Role Assignment, to control access permissions
  • ARM Templates

On a first look this may seem limited. On the other hand, an ARM template can specify any object on Azure, so we are not limited in relation to what we can deploy.

Blueprint Versioning

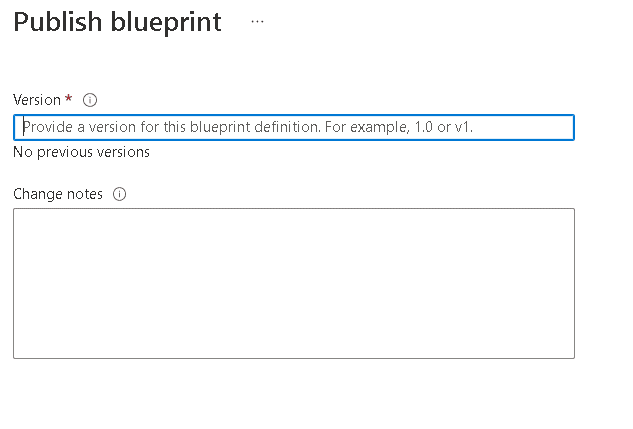
The blueprints are versioned. Once a blueprint version is created, it can’t be changed anymore. You can create new versions of the blueprint, but you can’t change an existing one. The version is created on the moment you publish a Blueprint you already completed.


This ensures we have control about what’s deployed. We can compare the version number of a deployed blueprint with the current version number and identify if any change on the blueprint has not be deployed yet.

Link to the Deployment

The deployment of the blueprint is made by creating an assignment between the blueprint and a subscription. The deployment is always on subscription level, since we will be deploying at least one resource group.


The assignment creates a relationship between the blueprint and the deployment. It’s also possible to lock the deployment, forbidding changes on the objects. This is basically the creation of lock objects on the deployed objects.


This relationship allows us to keep the deployed objects updated. We can, for example, upgrade the version of a blueprint used on an assignment.

Steps to build a Blueprint

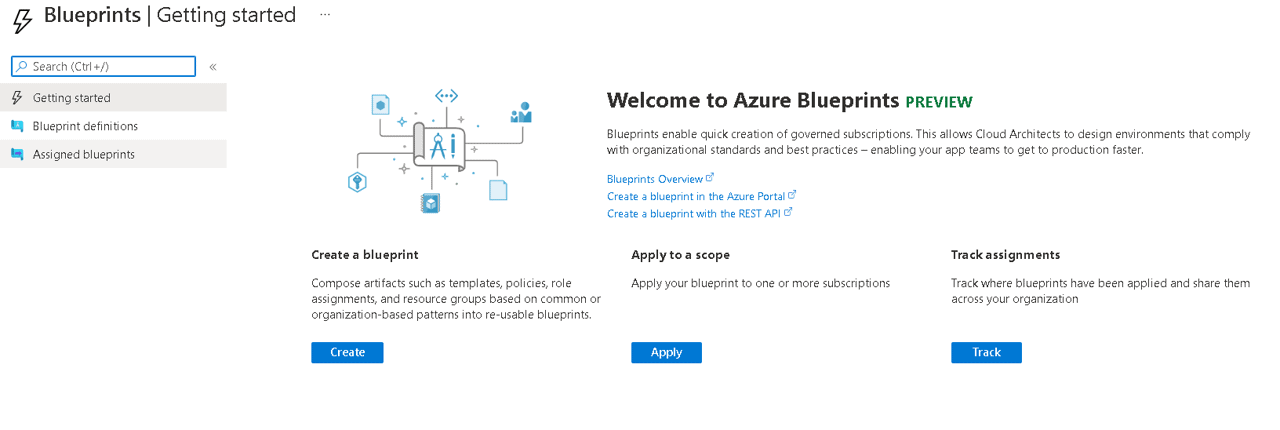
  1. Locate Blueprints in the portal and get into the Blueprint screen

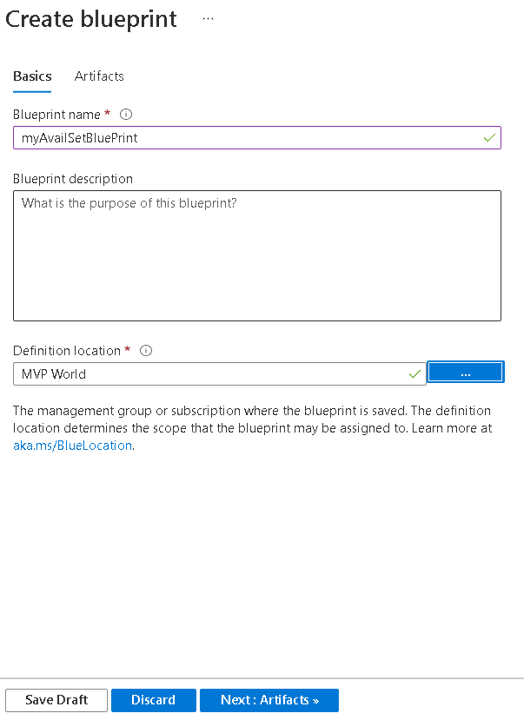
1)Click The Create button

2) Define the basic values for the blueprint. This includes where the blueprint will be saved. We usually save a blueprint in a management group, so it can be used on any subscription under the hierarchy of that management group


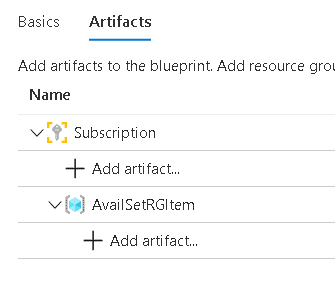
3) On the artifacts tab, include a resource group

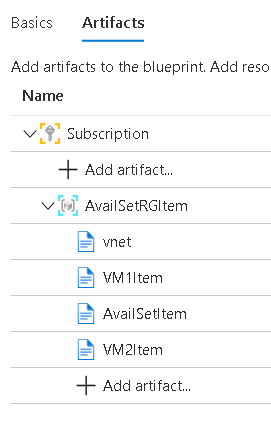
4) Under the resource group, include the ARM template. On this example I will include a Virtual Network, an Availability Set and two Virtual Machines

5) Save the blueprint as draft. Before publishing the blueprint you need to control the order of deployment. The Virtual Network needs to be deployed first, followed by the Availability Set and the Virtual Machines

Managing the deployment order

We may include many ARM templates in a single resource group. For example, a virtual network, multiple virtual machines, a load balancer and so on. The items deployed may have dependencies between each other. This requires us to be able to control the deployment order of the deployment inside a resource group.

The Bad News: The UI has no way for us to set dependencies between the artifacts or set a deployment order.

The Solution: This can be done using Azure CLI. We can execute this on the cloudshell

Using Cloudshell to set the dependency

The blueprint extension is not default on Azure CLI. The first step we need is to install the blueprint extension using the following statement:

az extension add --name blueprint

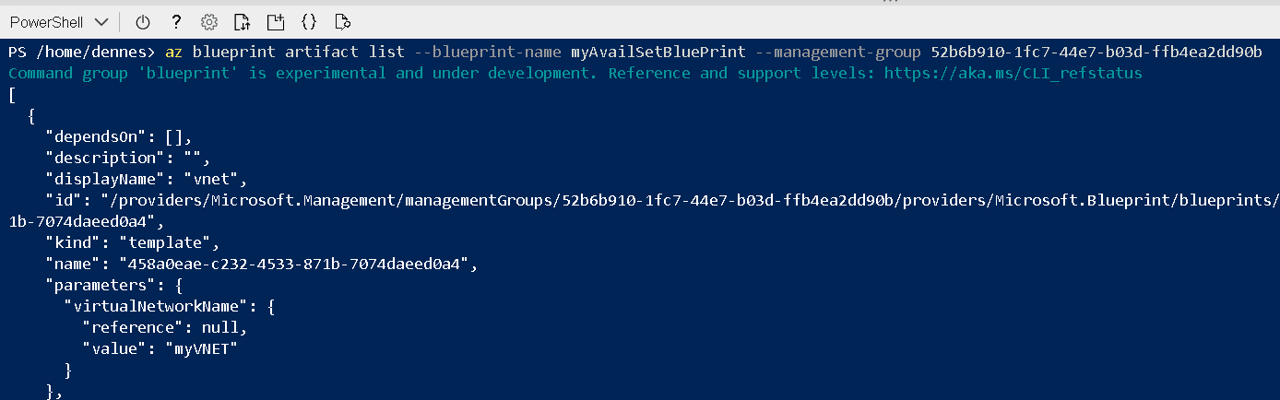
The second secret is about the artifact names. The beautiful names we see and set while building the blueprint are in fact an alias. Each artifact receives a GUID as a name. We need to list the artifacts in the blueprint and take a note of each artifact GUID. We will use the GUID later. This statement list the artifacts in the blueprint:

az blueprint artifact list --blueprint-name myAvailSetBlueprint --management-group 38c8950d-4b86-48cd-b555-9ff7d12c902d


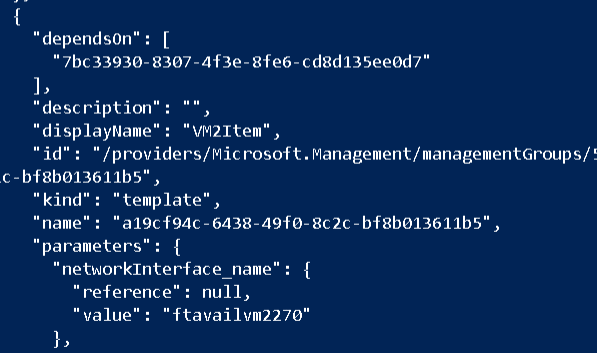
As you may notice, the management group is also specified as a GUID. Another bad news: Internally the blueprint is a JSON document which contains ARM templates. ARM templates are also JSON documents. The result of the above statement will be a huge JSON listed on the screen and you will need to identify where each artifact starts, so you can find its name.

Once you took note of the GUIDs, you can execute the statement below to set the dependency between the artifacts.

az blueprint artifact template update --blueprint-name availabilitySolution --artifact-name "c4ac3a4f-9d3c-4910-a9a1-642230f63acc" --depends-on "53ec7c79-14f8-4ae3-9cd8-1cad667f8c1b" --management-group 9c519b25-28e9-41ac-bd8d-e7235e5ea153

After updating the artifacts, you can list them again. You will find a “Depends” field on the artifacts, included by the above statement. This will set the order of the deployment.

The future of Blueprints

Blueprints are in an interesting situation in relation to Azure. At the same time they are still in preview, Microsoft decided to not evolve them further. Microsoft is focused on BICEP, a new language for Azure provisioning, easier than directly coding in ARM. In some ways, we can consider them deprecated.

Summary

The Blueprint UI is still very useful and the blueprint as a whole is easy to use, even considering the dependency problem between the artifacts. Managing this problem, we have a powerful tool for Azure deployments.

The post Azure Blueprints: Defining the order of artifacts deployment appeared first on Simple Talk.


from Simple Talk https://ift.tt/D2x438u
via

Friday, April 15, 2022

Working with MySQL Stored Procedures

The series so far:

  1. Getting started with MySQL
  2. Working with MySQL tables
  3. Working with MySQL views

Like most relational database management systems, MySQL supports the use of stored procedures that can be invoked on-demand by data-driven applications. Each stored procedure is a named database object that contains a routine made up of one or more SQL statements. When an application calls the stored procedure, MySQL executes those statements and returns the results to the application. 

A procedure’s routine can include a wide range of statements, including data definition language (DDL) and data manipulation language (DML). MySQL stored procedures also support the use of input and output parameters, making them a highly flexible tool for encapsulating statement logic.

Stored procedures enable SQL code to be reused as often as needed, helping to simplify application development and reduce statement errors. Developers don’t have to write complex queries for each application request, and QA teams don’t need to spend as much time verifying queries when testing applications.

The ability to reuse code also reduces network traffic because a stored procedure can be invoked with a single CALL statement, no matter how complex the underlying query. Stored procedures can also deliver a higher degree of security by abstracting the underlying database structure and eliminating ad hoc queries at the application level.

In this article, I demonstrate how to create and update stored procedures, as well as invoke them with a CALL statement. You’ll learn how to build both basic and parameterized procedures that use input and output parameters. As with the previous articles in this series, I used the MySQL Community edition on a Windows computer to build the examples, which I created in MySQL Workbench, the graphical user interface (GUI) that comes with the Community edition.

Preparing your MySQL environment

The examples in this article are based on the travel database, which is the same database I used for the previous article on MySQL views. This article uses the same tables and data to demonstrate how to work with stored procedures. If you tried the examples in the previous article, the travel database might still be installed on your MySQL instance. If it is not, you can use the following SQL script to create the database and its tables:

DROP DATABASE IF EXISTS travel;
CREATE DATABASE travel;
USE travel;
CREATE TABLE manufacturers (
  manufacturer_id INT UNSIGNED NOT NULL AUTO_INCREMENT,
  manufacturer VARCHAR(50) NOT NULL,
  create_date TIMESTAMP NOT NULL DEFAULT CURRENT_TIMESTAMP,
  last_update TIMESTAMP NOT NULL 
    DEFAULT CURRENT_TIMESTAMP ON UPDATE CURRENT_TIMESTAMP,
  PRIMARY KEY (manufacturer_id) ) 
ENGINE=InnoDB AUTO_INCREMENT=1001;
CREATE TABLE airplanes (
  plane_id INT UNSIGNED NOT NULL AUTO_INCREMENT,
  plane VARCHAR(50) NOT NULL,
  manufacturer_id INT UNSIGNED NOT NULL,
  engine_type VARCHAR(50) NOT NULL,
  engine_count TINYINT NOT NULL,
  max_weight MEDIUMINT UNSIGNED NOT NULL,
  wingspan DECIMAL(5,2) NOT NULL,
  plane_length DECIMAL(5,2) NOT NULL,
  parking_area INT GENERATED ALWAYS AS ((wingspan * plane_length)) STORED,
  icao_code CHAR(4) NOT NULL,
  create_date TIMESTAMP NOT NULL DEFAULT CURRENT_TIMESTAMP,
  last_update TIMESTAMP NOT NULL 
    DEFAULT CURRENT_TIMESTAMP ON UPDATE CURRENT_TIMESTAMP,
  PRIMARY KEY (plane_id),
  CONSTRAINT fk_manufacturer_id FOREIGN KEY (manufacturer_id) 
    REFERENCES manufacturers (manufacturer_id) ) 
ENGINE=InnoDB AUTO_INCREMENT=101;

The airplanes table includes a foreign key that references the manufacturers table, so be sure to create the tables in the order shown here. After you create the tables, you can add sample data to them so you’ll be able to test your stored procedure. To populate the table, run the following INSERT statements:

INSERT INTO manufacturers (manufacturer)
VALUES ('Airbus'), ('Beechcraft'), ('Piper');
INSERT INTO airplanes 
  (plane, manufacturer_id, engine_type, engine_count, 
    max_weight, wingspan, plane_length, icao_code)
VALUES 
  ('A380-800', 1001, 'jet', 4, 1267658, 261.65, 238.62, 'A388'),
  ('A319neo Sharklet', 1001, 'jet', 2, 166449, 117.45, 111.02, 'A319'),
  ('ACJ320neo (Corporate Jet version)', 1001, 'jet', 2, 174165, 117.45, 123.27, 'A320'),
  ('A300-200 (A300-C4-200, F4-200)', 1001, 'jet', 2, 363760, 147.08, 175.50, 'A30B'),
  ('Beech 390 Premier I, IA, II (Raytheon Premier I)', 1002, 'jet', 2, 12500, 44.50, 46.00, 'PRM1'),
  ('Beechjet 400 (from/same as MU-300-10 Diamond II)', 1002, 'jet', 2, 15780, 43.50, 48.42, 'BE40'),
  ('1900D', 1002, 'Turboprop', 2,17120,  57.75, 57.67, 'B190'),
  ('PA-24-400 Comanche', 1003, 'piston', 1, 3600, 36.00, 24.79, 'PA24'),
  ('PA-46-600TP Malibu Meridian, M600', 1003, 'Turboprop', 1, 6000, 43.17, 29.60, 'P46T'),
  ('J-3 Cub', 1003, 'piston', 1, 1220, 38.00, 22.42, 'J3');

As with the CREATE TABLE statements, you should run the INSERT statements in the order specified here so you don’t violate the foreign key defined on the airplanes table.

Creating a stored procedure in MySQL

To build a stored procedure in MySQL, you must use a CREATE PROCEDURE statement. To get started, open a new query window in Workbench and ensure that the target database is active. (To make a database active, double-click the database in Navigator or run a USE statement.) For this example, you’ll use the travel database.

When building your CREATE PROCEDURE statement, you must provide a name for the procedure and specify the SQL routine you want to persist to your database. The routine can include a single SQL statement such as SELECT or UPDATE, or it can be a compound statement. A compound statement is one that uses the BEGIN…END syntax to enclose a block of one or more SQL statements. The block can include a wide range of SQL language elements, including DDL and DML statements, variable declarations, embedded blocks, or flow control constructs such as loops or conditional tests.

Most stored procedures use a compound statement even if they include only a single SQL statement. For example, the routine in the following CREATE PROCEDURE statement includes a compound statement with only one SELECT statement:

DELIMITER //
CREATE PROCEDURE get_plane_info()
BEGIN
  SELECT a.manufacturer_id, m.manufacturer, 
    COUNT(*) AS plane_count,
    ROUND(AVG(a.wingspan), 2) AS avg_span, 
    ROUND(AVG(a.plane_length), 2) AS avg_length
  FROM airplanes a INNER JOIN manufacturers m
    ON a.manufacturer_id = m.manufacturer_id
  GROUP BY a.manufacturer_id
  ORDER BY m.manufacturer;
END//
  
DELIMITER ;

The example creates a procedure named get_plane_info. Notice that a set of parentheses follows the name. If the statement were to include input or output parameters, they would be defined within the parenthesis (which I’ll cover later in the article). If you don’t include parameters, you must still provide the parentheses.

The compound statement is defined by the BEGIN…END syntax, which encloses the single SELECT statement. The SELECT statement itself joins the airplanes and manufacturers tables, groups the data by the manufacturer_id column in the airplanes table, and calculates the average wingspan and plane_length values for each manufacturer. The statement also orders the results by manufacturer and provides the total number of plane models for each one. (We’ll be covering all these statement elements in more detail later in this series.)

As you can see, creating a simple stored procedure is a fairly straightforward process. At a minimum, you must provide a name and the routine body. However, you no doubt noticed the inclusion of the two DELIMITER statements that surround the procedure definition.

By default, MySQL uses the semi-colon (;) as a statement delimiter. This helps to ensure that a client sends a statement to the server in its entirety without confusing it with other statements. However, a compound statement within a stored procedure might include one or more delimiters, in addition to the definition’s final delimiter, and all these delimiters can cause confusion when passing the CREATE PROCEDURE statement from a client to the server.

To get around this issue, MySQL supports the use of the DELIMITER statement, which lets you temporarily change the delimiter so you can pass the entire procedure definition to the server as a single statement. In the above example, the first DELIMITER statement changes the delimiter to double forward slashes (//), and the second DELIMITER statement changes the delimiter back to a semi-colon. The temporary delimiter is then used at the end of the CREATE PROCEDURE statement (after the END keyword), but the SELECT statement itself is still terminated with the semi-colon delimiter.

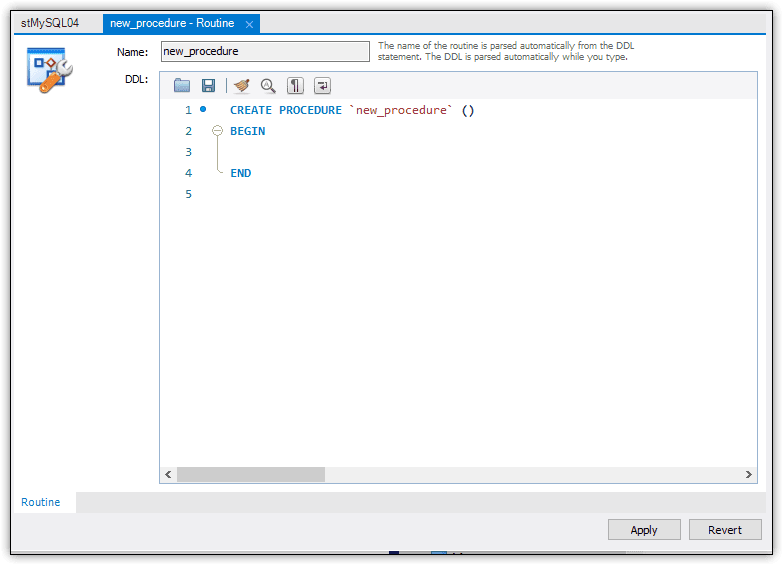
I also wanted to point out that MySQL Workbench provides a tool (in the form of a tab) for creating and editing stored procedures. The tool is similar to the one used for creating and editing views. It provides a stub for building a CREATE PROCEDURE statement but leaves it up to you to fill in the details. Figure 1 shows the Stored Procedure tab as it appears when you first launch it in Workbench.

The Create Procedure dialog. It has the stub of the proc, CREATE PROCEDURE 'new_procedure'() BEGIN END

Figure 1. Adding a stored procedure through the Workbench GUI

To launch the Stored Procedure tab, select the target database in Navigator and then click the create stored procedure button on the Workbench toolbar. (The button includes the tooltip Create a new stored procedure in the active schema in the connected server.) When the Stored Procedure tab appears, you can start building your statement. After you finish, click Apply. MySQL will then add a few statement components that are necessary to create the procedure. Review the final script, click Apply once more, and then click Finish. The stored procedure will be added to the target database.

The Stored Procedure tab can be useful for creating and editing a stored procedure, so I wanted to be sure you knew it’s available. However, I prefer to use a query tab when working with a stored procedure because I think it’s easier and saves steps, so this is the approach I take for the examples in this article.

Verifying a newly created stored procedure

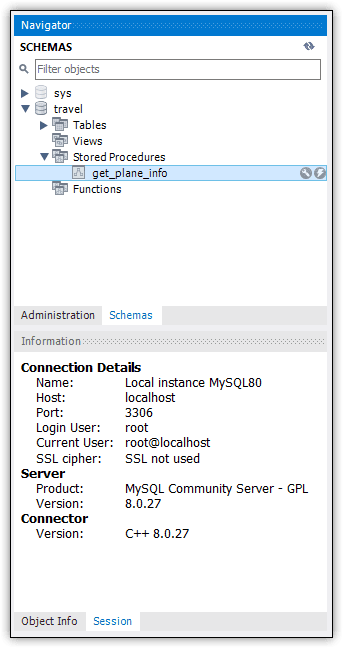
After you run the CREATE PROCEDURE statement, you can verify that it’s been added to the travel database by viewing it in Navigator, as shown in Figure 2. (You might need to refresh Navigator to see the new procedure.)

Image showing the Navigator. Under Travel, Stored Procedures, the new proc get_plane_info is selected

Figure 2. Viewing the stored procedure in Navigator

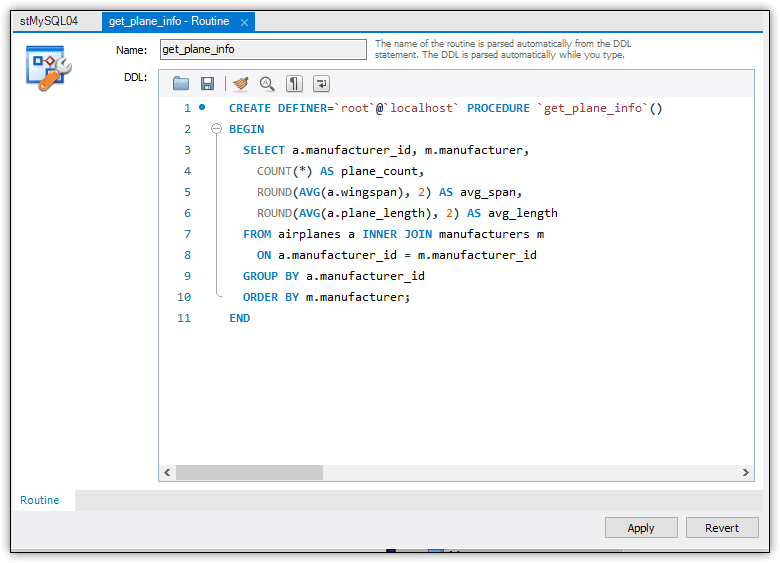
From Navigator, you can open the procedure definition in the Stored Procedure tab by clicking the wrench icon next to the procedure name. Figure 3 shows the procedure definition as you created it, except for one difference. It now includes the DEFINER clause after the CREATE keyword.

Image showing get_plane_info in the stored procedure dialog. The code is the same as before without the DELIMITER lines and has added DEFINER='root'@'locatlhost' between CREATE and PROCEDURE

Figure 3. Viewing the procedure definition on the Stored Procedure tab

The DEFINER clause specifies which account has been designated as the procedure creator. Because I created the stored procedure under the root account on my local MySQL instance, that is the username added to the definition. By default, MySQL uses the account of the user who executed the CREATE PROCEDURE statement, but you can specify a different account as long as it’s been granted adequate permissions.

Other than the DEFINER clause, your stored procedure definition should look much like what you created, except that there are no DELIMITER statements or custom delimiter. However, if you were to update the definition on the Stored Procedure tab and click Apply, Workbench would add those elements for you.

Another way to verify whether your stored procedure has been created is to query the routines view in the INFORMATION_SCHEMA database:

SELECT * FROM information_schema.routines
WHERE routine_schema = 'travel';

The statement includes a WHERE clause that limits the results to the travel database. Any routines (stored procedures or functions) that have been created in the database will be returned by this query.

You can limit the results further by also specifying the procedure name in the WHERE clause and by specifying which column or columns to return. For example, the following SELECT statement limits the results to the routine_definition column and the get_plane_info routine in the travel database:

SELECT routine_definition
FROM information_schema.routines
WHERE routine_schema = 'travel'
  AND routine_name = 'get_plane_info';

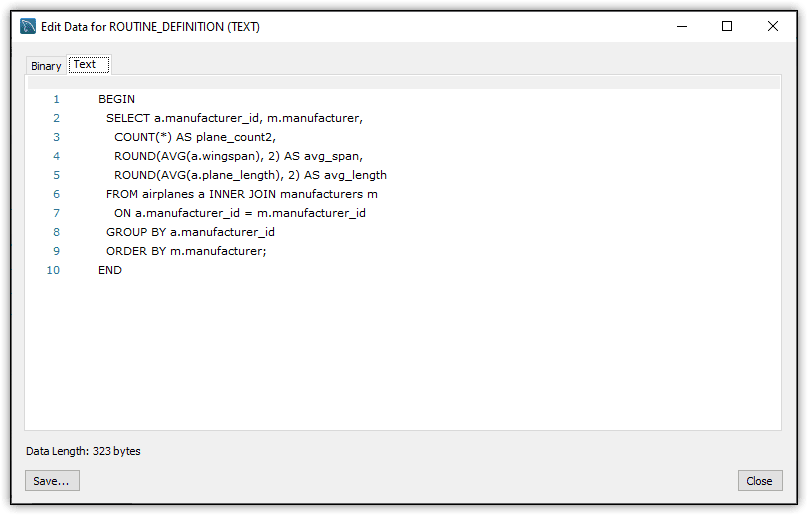
Although the statement returns only a single value, it can still be difficult to read, especially if it’s a complex compound statement. To view the statement in its entirety, right-click the value directly in the results and click Open Value in Viewer. Select Text if it’s not already selected. MySQL launches a separate window that displays the value, as shown in Figure 4.

Image showing the Edit Data for ROUTINE_DEFINITION (TEXT) dialog. The definition of the stored procedure is shown

Figure 4. Examining the stored procedure’s routine body in Viewer

Of course, verifying that the stored procedure exists doesn’t tell you whether it will work as expected. For this reason, you should also execute the procedure and see what sort of results it returns (in addition to running it through a proper QA cycle). For this, use a CALL statement that specifies the procedure name, as shown in the following example:

CALL get_plane_info;

When you call the procedure, MySQL runs the stored routine and returns the statement results, which are shown in Figure 5.

Image showing the results of the stored procedure call. Three rows are returned.

Figure 5. Viewing the results after calling the stored procedure

As expected, the CALL statement returns the aggregated airplane data, grouped by manufacturer. These are the same results that you would have received if you ran the routine’s SELECT statement directly. However, the statement is now persisted to the database, eliminating the need to write the statement at the application level.

Adding an input parameter to a stored procedure

The get_plane_info stored procedure created in the previous section demonstrated most of the main components that go into a MySQL stored procedure. In a production environment, the compound statement will likely be more complex, but this example still provides most of the basics. That said, one of the most beneficial aspects of a stored procedure is its ability to support input and output parameters.

In this section, I demonstrate how to add an input parameter to the procedure definition. (I’ll cover output parameters in the next section.) Before I get into that, you should be aware that you cannot simply alter a procedure definition like you can a table or view definition. You can modify a procedure’s characteristics, but nothing more. To make any significant updates, you must drop the procedure and then re-create it, incorporating any new elements.

To drop a stored procedure, you can use a DROP PROCEDURE statement, as shown in the following example:

DROP PROCEDURE IF EXISTS get_plane_info;

The IF EXISTS clause is optional, but it can help avoid unnecessary errors. After you run this statement, you can confirm that the procedure has been dropped by again querying the routines view in the INFORMATION_SCHEMA database:

SELECT * FROM information_schema.routines
WHERE routine_schema = 'travel';

The statement should now return an empty result set, unless you created other stored procedures or functions.

After you delete the get_plane_info stored procedure, you can update your CREATE PROCEDURE statement to include an input parameter. For each parameter, you should specify the parameter type, the parameter name, and the parameter’s data type. MySQL supports three parameter types:

  • IN. Input parameter that passes a value from the caller into the procedure’s routine.
  • OUT. Output parameter that passes a value from the routine back to the caller.
  • INOUT. Parameter that can be initialized by the caller, updated by the routine, and then returned to the caller with its new value.

The following CREATE PROCEDURE statement includes one input parameter, which is named in_name and defined with the VARCHAR(50) data type:

DELIMITER //
CREATE PROCEDURE get_plane_info(
  IN in_name VARCHAR(50))
COMMENT 'retrieves aggregated airplane information'
BEGIN
  SELECT a.manufacturer_id, m.manufacturer, 
    COUNT(*) AS plane_count,
    ROUND(AVG(a.wingspan), 2) AS avg_span, 
    ROUND(AVG(a.plane_length), 2) AS avg_length
  FROM airplanes a INNER JOIN manufacturers m
    ON a.manufacturer_id = m.manufacturer_id
  WHERE m.manufacturer = in_name;
END//
DELIMITER ;

The parameter definition is enclosed in parentheses and includes the IN keyword, parameter name, and data type. I also updated the SELECT statement to reflect the use of the parameter. It no longer includes the GROUP BY and ORDER BY clauses but now includes a WHERE clause that compares the in_name parameter to the manufacturer column. In this way, the caller can specify the manufacturer on which to base the query.

The CREATE PROCEDURE statement also includes the COMMENT characteristic, which appends a comment to the procedure definition. You can include one or more characteristics in a CREATE PROCEDURE statement after the parameter definitions. A characteristic is one of several options that can be added to a procedure definition. Each characteristic affects the procedure definition in a different way. For example, this characteristic adds a comment, but you can also use characteristics to indicate the routine language, specify whether the routine is deterministic, or define the routine’s nature.

When calling a stored procedure that takes an input parameter, you must include the parameter value in parentheses. If it’s a character value, you must enclose it in single quotes. For example, the following CALL statement specifies piper as the value for the procedure’s input parameter:

CALL get_plane_info ('piper');

When MySQL runs the procedure’s routine, it substitutes the piper value for the in_name parameter specified in the WHERE clause. Figure 6 shows the results now returned by the stored procedure.

Image with results of stored procedure call. Only one row is returned

Figure 6. Calling a stored procedure with an input parameter

When defining your stored procedure, you can include multiple IN parameters, separating them with commas. Then, when you call the procedure, you specify each parameter value within the parentheses, again separated with commas. You can also include OUT parameters or INOUT parameters alongside the input parameters.

Adding output parameters to a stored procedure

Now let’s look at how to add multiple OUT parameters to the get_plane_info stored procedure. Output parameters provide a mechanism for returning one or more values back to the caller, rather than returning a single result set. For this example, you’ll add five output parameters, which will correspond to the columns specified in the routine’s SELECT list.

To add the parameters, you’ll need to again drop the procedure and then run an updated CREATE PROCEDURE statement. The output parameters are specified within the same parentheses as the input parameter, as shown in the following script:

DROP PROCEDURE IF EXISTS get_plane_info;
DELIMITER //
CREATE PROCEDURE get_plane_info(
  IN in_name VARCHAR(50),
  OUT out_id INT UNSIGNED,
  OUT out_name VARCHAR(50),
  OUT plane_count SMALLINT UNSIGNED,
  OUT avg_wingspan DECIMAL(5,2), 
  OUT avg_length DECIMAL(5,2))
COMMENT 'retrieves aggregated airplane information'
BEGIN
  SELECT a.manufacturer_id, m.manufacturer, 
    COUNT(*),
    ROUND(AVG(a.wingspan), 2), 
    ROUND(AVG(a.plane_length), 2)
  INTO out_id, out_name, plane_count, avg_wingspan, avg_length
  FROM airplanes a INNER JOIN manufacturers m
    ON a.manufacturer_id = m.manufacturer_id
  WHERE m.manufacturer = in_name;
END//
DELIMITER ;

For each output parameter, you must specify the OUT keyword, the parameter name, and the parameter’s data type. In addition, you must add an INTO clause after the SELECT list that returns the results to the output parameters. I’ve also removed the column aliases from the SELECT list because they’re no longer needed.

When you call a stored procedure that returns output parameters, you can capture those parameter values by passing in a user-defined variable for each output parameter to hold its value, as shown in the following CALL statement:

CALL get_plane_info ('beechcraft', @out_id, @out_name, 
  @plane_count, @avg_wingspan, @avg_length);

The CALL statement specifies beechcraft as the input parameter value. This is followed by five user-defined variables, which correspond to the parameters specified in the stored procedure definition. When you run the CALL statement, the returned parameter values are assigned to the variables.

The exact way in which you’ll handle output parameters in your application will depend on the programming language that you’re using. In the meantime, you can then verify that your variables contain the expected values by running a SELECT statement similar to the following:

SELECT @out_id, @out_name, @plane_count, @avg_wingspan, @avg_length;

Figure 7 shows the results returned by the SELECT statement.

Image showing the results of calling the stored procedure with Beechcraft

Figure 7. Viewing the routine’s output parameter values for Beechcraft planes

The figure shows the results when you specify beechcraft as the input value when calling the stored procedure. If you were to specify another value, such as airbus, your SELECT statement would return much different results, as shown in Figure 8.

Image showing the results of the stored procedure called with Airbus

Figure 8. Viewing the routine’s output parameter values for Airbus planes

Both IN and OUT parameters can make stored procedures far more flexible when supporting data-driven applications. You might also encounter situations when you want to use an INOUT parameter. For example, you might create a stored procedure that includes some type of counter. You can use an INOUT parameter to set the counter’s initial value and then return the new counter value based on the routine’s output.

Altering a stored procedure in MySQL

MySQL supports the ALTER PROCEDURE statement for updating a procedure’s characteristics. You cannot use this statement to make any other changes to a procedure definition. You are limited to characteristics only. For example, the following ALTER PROCEDURE statement adds two characteristics to the procedure definition, but the rest of the procedure definition will remain unchanged:

ALTER PROCEDURE get_plane_info
READS SQL DATA
SQL SECURITY INVOKER;

The READS SQL DATA characteristic indicates that the routine includes statements that read data. This type of characteristic is advisory only and does not constrain the routine in any way. The SQL SECURITY INVOKER characteristic indicates that the routine should run under the security context of the user account that invokes the routine rather than the definer account.

After you run the ALTER PROCEDURE statement, you can verify that the characteristics have been added by viewing the procedure definition on the Stored Procedure tab, which is shown in Figure 9.

Image showing the stored procedure in the edit dialog. The three characteristics can be seen: READS SQL DATA, SQL SECURITY INVOKER, COMMENT 'retrieves aggregated airplane information'

Figure 9. Viewing the procedure definition on the Stored Procedure tab

Notice that the CREATE PROCEDURE statement now includes three characteristics: the two you just added and the original COMMENT characteristic that you added earlier.

Working with stored procedures in MySQL

Stored procedures can offer a great deal of flexibility, while helping to streamline application development. However, a procedure is only as effective as its underlying routine and the SQL statements it contains. In this exercise, I showed you how to create a stored procedure whose routine contained a single SELECT statement, but you can build routines that define far more complex logic. Later in the series, I’ll be demonstrating how to create more robust compound statements that you can build into your stored procedures or use for other types of queries.


The post Working with MySQL Stored Procedures appeared first on Simple Talk.


from Simple Talk https://ift.tt/7WCkFZi
via