Made available to everyone starting with Unity 2018.1, the C# Job System allows users to write multithreaded code that interacts well with Unity. For many Unity users, this was a big deal. Better performance is so important to many people playing video games that players will often set their game’s graphics settings to something low so that the game will run optimally. But who says you have to force players to tweak their game’s settings to get the performance they want? Why not have peak performance from the start?
With Unity’s C# jobs, this is made much easier for the developer. This is especially true if you plan to create a game that requires many objects in the game’s world, with all of them doing something at the same time. Normally, this would be incredibly taxing for the machine running this game, but thanks to the newly implemented Job System, you can now more easily achieve this scenario without taking a performance hit. Unity’s C# jobs have been touched on before back when Unity 2018.1 was first released, but it only went skin deep. This time jobs will be explained in much more detail along with a tutorial showing you how to create a job that moves 3,000 cubes around in a scene. Note: you may need to adjust this number depending on the power of your computer.
Setting Up
Once you’ve started Unity, create a new project.

Figure 1: Creating a new project.
After that, name the project 3000Cubes. Then set your file path of choice. You’ll also want to make sure you’re using the 3D project template. After this has been done, click Create Project.
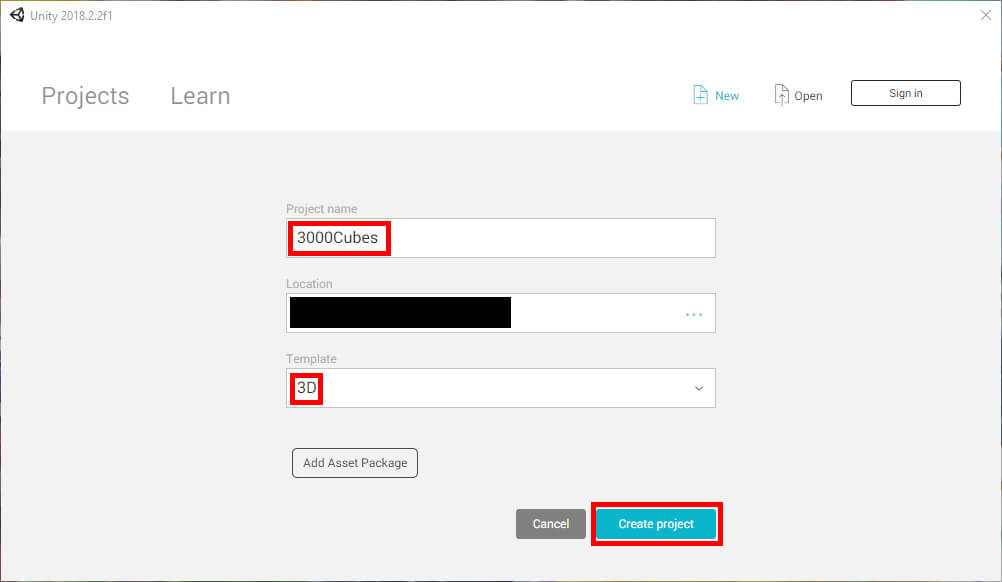
Figure 2: Setting project name, location, and template.
Unity will then do some work, then present you with a blank project like that shown in Figure 3.

Figure 3: A new blank project
Believe it or not, there are only two things that need to be done before jumping into the code. First, in the Hierarchy menu, click the Create button and select Create Empty to create a new object.
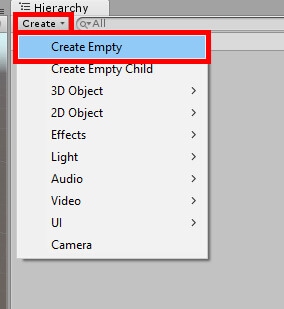
Figure 4: Creating a new object.
Name this object JobObject. After that, with JobObject selected in the Hierarchy, click the Add Component button in the Inspector window. In the window that appears, scroll to the very bottom and select New Script.
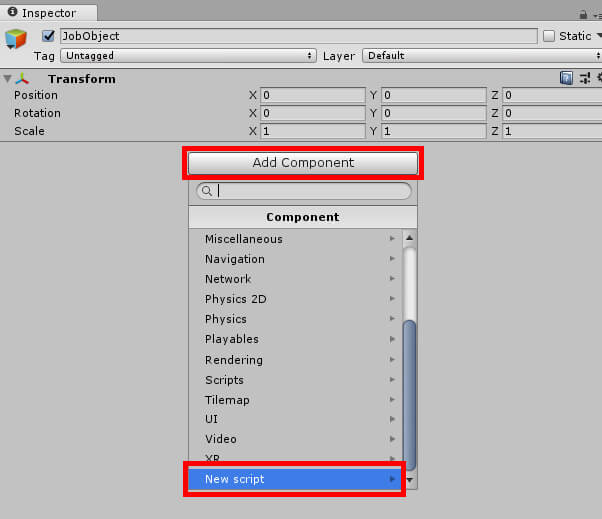
Figure 5: Creating and adding a new script component.
In the next window, name this script CubeMovementJob, then click Create and Add.
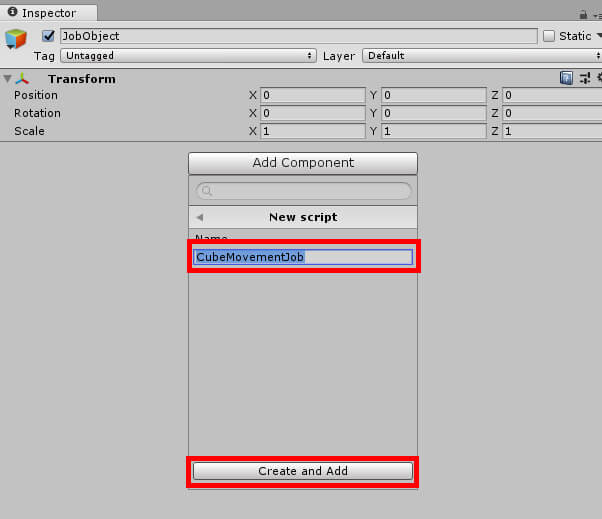
Figure 6: Naming the script and creating it.
With that finished, JobObject should now look like what’s shown in Figure 7.
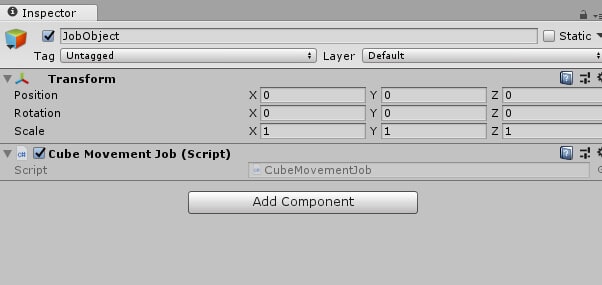
Figure 7: JobObject with the new script attached.
Setup is now complete! Yes, even the process of setting up a project is made faster thanks to Unity jobs. In the Inspector window, double click the Script field in the newly added Cube Movement Job component to open up Visual Studio and create your new C# job!
The Code
This project aims to show you two things: the first is to show how to create jobs. The second is to show off how much of a boost using C# jobs can give you compared to what you might usually do. Before declaring variables and creating your first job, you will need to enter some using statements. At the top of the script, before the class declaration, add the following lines of code:
using UnityEngine.Jobs;
using Unity.Collections;
using Unity.Jobs;
UnityEngine.Jobs and Unity.Jobs are required to access and utilize the job functionality in your script. They’ll also be required for certain variables you will declare later. Unity.Collections allow you to make use of the NativeArray<> struct type, which will be required when working with C# jobs. Next, declare the following variables:
public int count = 3000;
public float speed = 20;
public int spawnRange = 50;
public bool useJob;
private Transform[] transforms;
private Vector3[] targets;
private List<GameObject> cubes = new List<GameObject>();
private TransformAccessArray transAccArr;
private NativeArray<Vector3> nativeTargets;
The first four public variables will be used to dictate how many cubes will be spawned, the speed at which it moves, the range that the cubes can be spawned in, and, finally, if you wish to use C# jobs or not. They have been made public so that they can be edited later from within the Unity editor in case you wish to add more cubes or increase the area they can spawn in. After these have been declared, a handful of private arrays will be created. The first two, transforms and targets, are arrays that will store the transform and Vector3 data of the various cubes you create.
Next, you’ll have a new List named cubes, followed by the creation of the TransformAccessArray and a NativeArray<Vector3>. Cubes will simply be a list kept of all the cubes spawned and will be used later when creating the same project in non-job code. Then there’s transAccArr and nativeTargets. These two arrays will store the information gathered from transforms and targets and send them to the job you shall soon create. But why can’t we use the transforms and targets arrays instead? This is because, according to Unity’s own debugger, the type of Transform and Vector3 is not a value type, and jobs cannot contain any reference types. Put simply, jobs can only work with other structs, which Transform and Vector3 are not.
So now you may be wondering why you would declare those first two arrays at all? They will be needed to fill the transAccArr and nativeTargets arrays, as you cannot simply add a new item to a TransformAccessArray and NativeArray. Instead, you will fill the transforms and targets arrays then hand the data over to transAccArr and NativeTargets to put to use in the job. In addition, you’ll also want them for later in the project when you use non-job code to perform the same task.
Quite a bit of explanation to be done here! Let’s take a break and see where your code should be now.
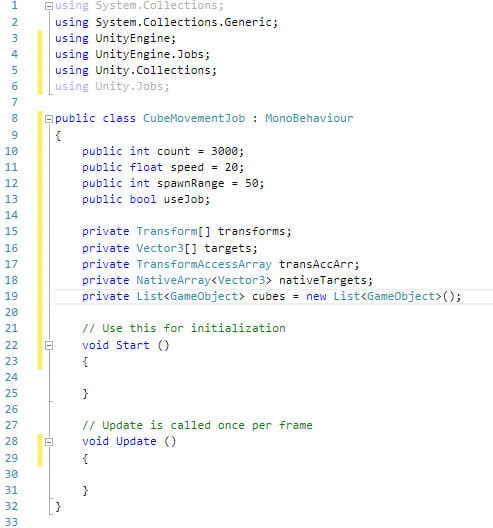
Figure 8: All using statements and variable declarations.
Now seems like a good time to create the C# job. Underneath your variable declarations, add the following:
struct MovementJob : IJobParallelForTransform
{
        public float deltaTime;
        public NativeArray<Vector3> Targets;
        public float Speed;
        public void Execute(int i, TransformAccess transform)
        {
                transform.position = Vector3.Lerp(transform.position, Targets[i], deltaTime / Speed);
        }
}
Let’s break this down. For starters, all jobs are structs and must inherit from either IJob, IJobParallelFor or IJobParallelForTransform. In this case, it’s inheriting from IJobParallelForTransform because you will use this job to move objects, which IJobParallelForTransform allows you to do.
Next, a few variables are declared. The first, deltaTime, will simply keep track of what is currently in Time.deltaTime. You can’t simply say Time.deltaTime in the job, so you get the value of deltaTime and store it as a float in the job. Next is a NativeArray that will store an array of Vector3s called Targets. Finally, there’s another float named Speed, which will simply get the value of the public variable speed.
Then comes the interesting part. Execute is a function all jobs are required to have. As you may have guessed, whatever is inside Execute is what the job will actually do. In this case, you have the job doing a simple task. It will get all the cube objects and have them Lerp (meaning to smoothly move from one position to the next) from one point to another at a certain speed. Within the () of the Execute function lies two parameters, an integer simply named i, and a TransformAccess simply named transform. The variable i will be treated much like i would if this were a for loop, and transform will contain a given object’s transform.
At this point, the script should now look something like what’s shown in Figure 9.
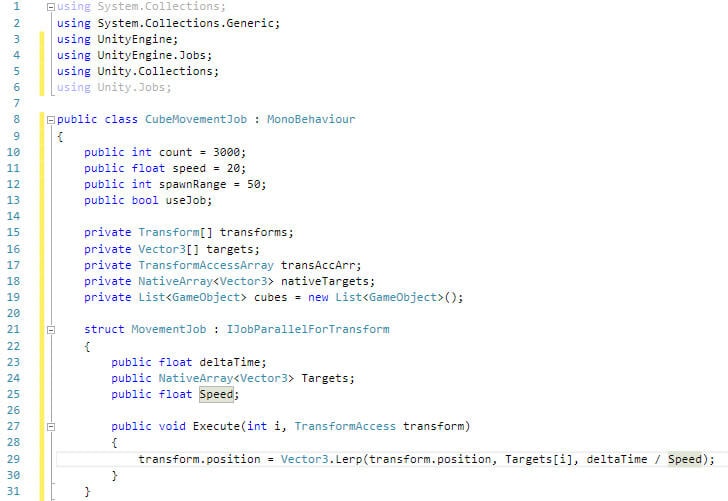
Figure 9: Your new C# job!
Before working on the Start and Update functions, there are two more variables to declare, and they’re both important to the job you just created. Beneath your new job and above the Start method, enter these lines:
private MovementJob job;
private JobHandle newJobHandle;
The first variable is pretty simple. You’re simply declaring a reference to the MovementJob. After that you declare a JobHandle that you’ll just call newJobHandle. A JobHandle is almost exactly what it sounds like. It handles jobs, doing so by scheduling and completing the jobs you assign it. With everything declared and ready to roll, it’s time to work on the Start function.
transforms = new Transform[count];
for (int i = 0; i < count; i++)
{
        GameObject obj = GameObject.CreatePrimitive(PrimitiveType.Cube);
        cubes.Add(obj);
        obj.transform.position = new Vector3(Random.Range(-spawnRange, spawnRange), Random.Range(-spawnRange, spawnRange), Random.Range(-spawnRange, spawnRange));
        obj.GetComponent<MeshRenderer>().material.color = Color.green;
        transforms[i] = obj.transform;
}
targets = new Vector3[transforms.Length];
StartCoroutine(GenerateTargets());
You create the Start function by first taking the transforms array and creating a new array of Transform with count defining the number of elements in the array. Count is the variable that keeps track of how many cubes you will spawn. Speaking of which, the next part of the function has you creating a for loop. Within this for loop, you create a cube, add it to the cubes list, give it a random starting position, and give it a green color. Of course, feel free to change the color if you wish.
After that, the transforms array gets its next value by getting the recently created cube’s transform. This process continues until every cube is spawned. Then, the targets array gets a new array of Vector3 using transforms.Length to define the number of elements within this array. Finally, a Coroutine will be run to fill the targets array. But that Coroutine has not yet been defined, so no doubt Visual Studio will start telling you it has no idea what this is. It’s now time to create this Coroutine, but first, check to make sure your code looks like Figure 10 below.
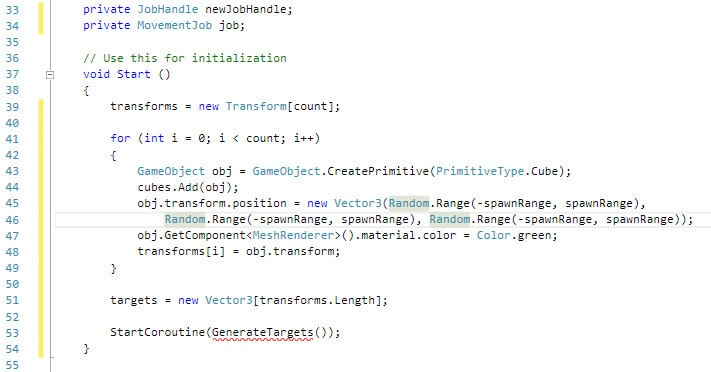
Figure 10: The Start function and the final variable declarations.
A Coroutine is created by creating an IEnumerator. It then operates very similarly to a function except that it can pause execution and return control to Unity, but then carry on wherever it left off on the next frame. It is required that a yield return statement is included somewhere within the body of the Coroutine. The yield return line is the point when an execution pauses and can be resumed in the following frame. Now that you know what a Coroutine is, it’s time to create one! Place the following code underneath the Update function.
public IEnumerator GenerateTargets()
{
        for (int i = 0; i < targets.Length; i++)
                targets[i] = new Vector3(Random.Range(-spawnRange, spawnRange), Random.Range(-spawnRange, spawnRange), Random.Range(-spawnRange, spawnRange));
        yield return new WaitForSeconds(2);
}
In this case, your GenerateTargets coroutine will simply create the cubes within the range you specify. This is among one of the simpler tasks you can do with coroutines. You can also create a typewriter effect with text and more using coroutines. Now, move on to the Update function and input this code.
transAccArr = new TransformAccessArray(transforms);
nativeTargets = new NativeArray<Vector3>(targets, Allocator.Temp);
if (useJob == true)
{
        job = new MovementJob();
        job.deltaTime = Time.deltaTime;
        job.Targets = nativeTargets;
        job.Speed = speed;
        newJobHandle = job.Schedule(transAccArr);
}
else
{
        for (int i = 0; i < transAccArr.length; i++)
                cubes[i].transform.position = Vector3.Lerp(cubes[i].transform.position, targets[i], Time.deltaTime / speed);
}
Your Update function will do one of two things depending on the value of the useJob boolean. If you set it to true, then your project will utilize the job you created to move the various cubes around the scene. When using jobs, you create a new instance of MovementJob and assign the different variables in the job. Next, you utilize the JobHandle called newJobHandle to schedule the job you created. When scheduling the job, you give transAccArr as the TransformAccessArray that the job will use in its Execute function.
If you set useJob to false, then the program will instead accomplish the same task without using the C# job system. You’ll see later that, especially with many objects in the scene at once, that using jobs can greatly improve your project’s performance at runtime. Once you’re finished, the Update function and GenerateTargets coroutine should look similar to the figure below.
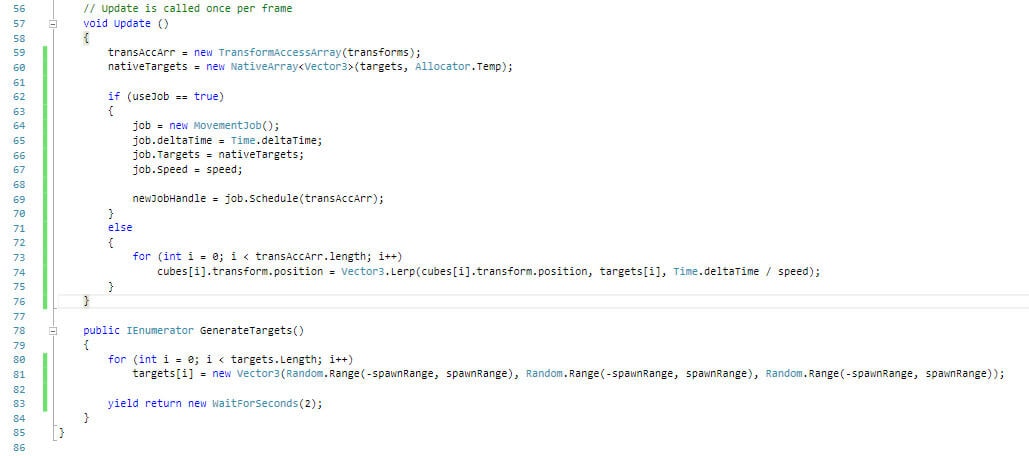
Figure 11: The Update function and GenerateTargets coroutine.
There is still one last task to complete before you can test out the project. Between the Update function and GenerateTargets coroutine, create a new function called LateUpdate and give it the following code.
private void LateUpdate()
{
        newJobHandle.Complete();
        transAccArr.Dispose();
        nativeTargets.Dispose();
}
There’s not much to this code, but it’s important to include this function to properly finish jobs and prevent memory leaks. LateUpdate is called whenever all Update functions have been called. It can be useful to order script execution. Some examples of where LateUpdate can be used include moving a camera or, in your case, disposing native collections. There’s also the act of calling newJobHandle's Complete function. This function simply ensures that the job has been completed before moving on to another job you may give Unity. Once you’ve added this code, your script should look like this:
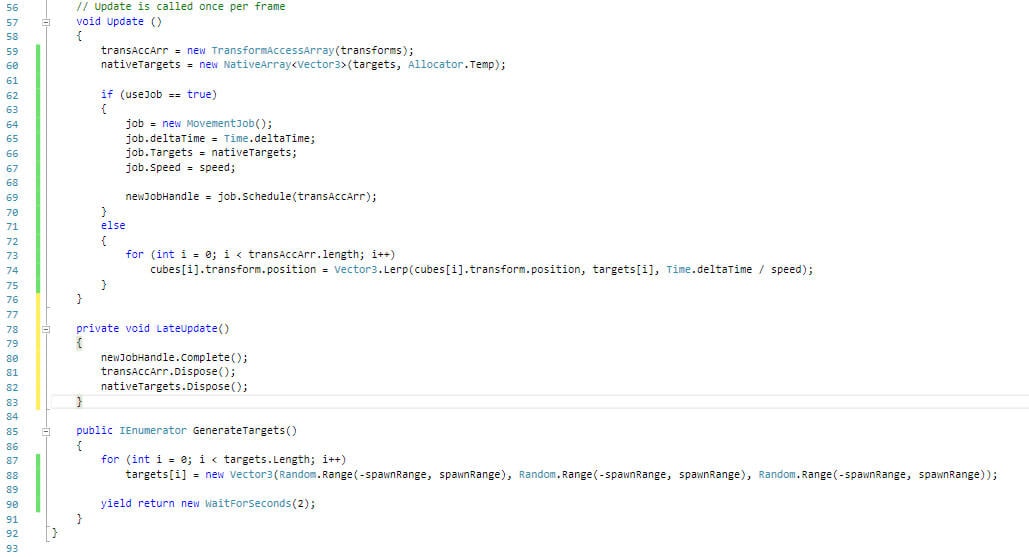
Figure 12: Script with LateUpdate added.
The time has now come to finish this project. Save your code and return to the Unity editor.
Finishing the Project
Much like the setup, finishing the project has very little to it. Select jobObject in the Hierarchy window, then navigate to the Inspector window and check out the Cube Movement Job script component. All the variables shown dictate the number of cubes spawned, how quickly they move, and the range that they can spawn in. There is also a checkbox that toggles your useJob boolean to true or false. For the moment, leave this boolean as false (unchecked). The rest of the variables can be left at their default values if you wish, but the example will assume you kept the cube count at 3,000.
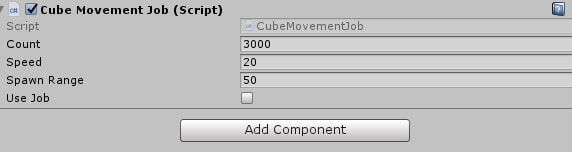
Figure 13: The complete CubeMovementJob script component.
Before playing the project, it would be helpful to open the Profiler window to view the performance of your project. To do this, click Window->Analysis->Profiler or simply press Ctrl + 7. Place the profiler anywhere you wish on your screen.
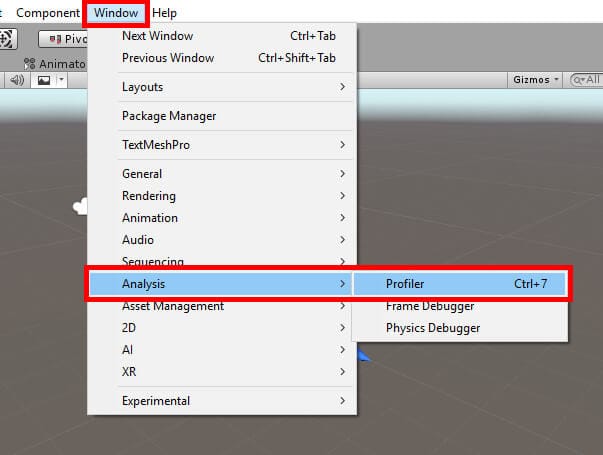
Figure 14: Opening the Profiler window.
After you’ve pulled up the Profiler window, save your project. If your computer finds itself unable to handle 3,000 cubes, it could lead to Unity crashing. Saving the project will, therefore, prevent any time and effort being lost. Should Unity crash, lower the number of cubes created. Begin the project by clicking the Play button at the top of the editor.
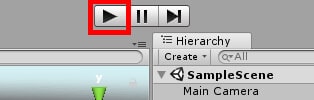
Figure 15: Starting the project.
While the project runs, click anywhere in the top part of the Profiler window to view more information about how much time it takes to do specific tasks. The blue area in the Profiler window represents how much CPU usage is going towards performing the tasks in your script.
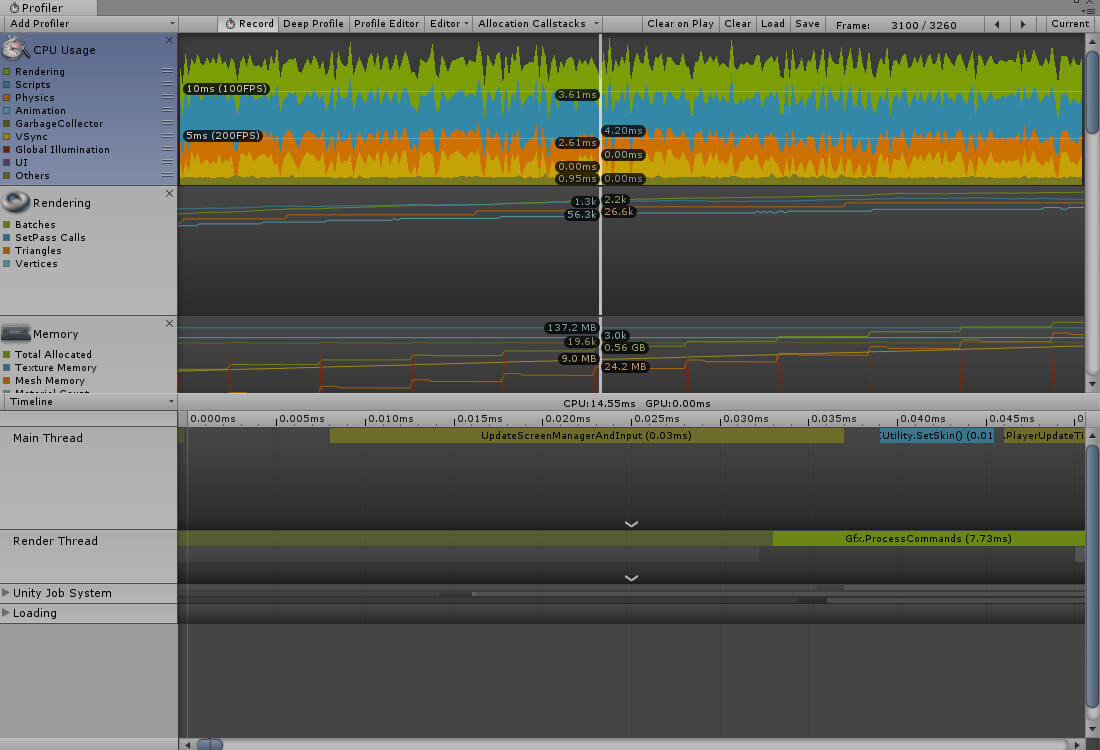
Figure 16: Unity Profiler when not using jobs. Time to finish script functions is 4.2 ms.
Remember, you should have it set up where you are currently not using jobs. Now, either pause the project or stop it to go back and set the useJob boolean to true, then run your program again to see the difference.
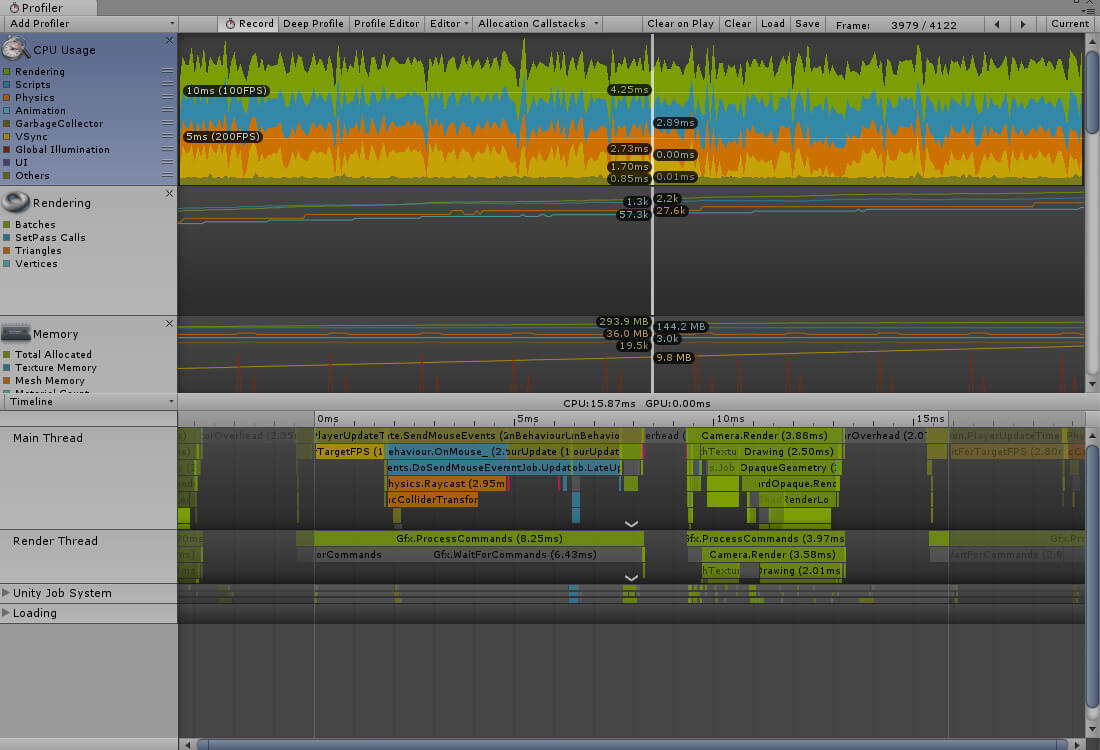
Figure 17: Unity Profiler while using jobs. Time to finish script functions is now 2.89 ms.
Notice how when using jobs, the amount of time the CPU takes to complete the task is cut almost in half. The difference is even more noticeable when increasing the number of cubes to spawn. On my computer, when increasing the number of cubes to 10,000 and not using jobs, the process could take 18 ms. Utilizing jobs in the same set of circumstances brought that time down to 13 ms. Of course, how much of a performance improvement one sees can depend on their individual CPU and what its capabilities are. Regardless, there’s no denying the improved performance that came once C# jobs entered the picture.

Figure 18: The finished project in action.
Conclusion
Multi-threaded code offers better performance to the developer though can be difficult to write. Thanks to Unity Technologies’ latest offerings, creating multi-threaded code is more easily achievable for the developer. Though situations demanding the C# job system may vary, the performance boost it can bring is immense. Another new tech for Unity, the Entity Component System, can also be utilized to further increase performance. ’Performance by default’ is the tagline for Unity 2018, and it’s easy to see why.
Some examples of where the job system can be put to great use include battle simulators, ocean simulators, and more. This example shows the job system moving around objects in a scene but can also be used to deform meshes and other tasks. Many tasks with a heavy load on your CPU can be lightened thanks to C# jobs, and it all starts by simply creating a struct and inheriting from a job interface.
The post Introducing the Unity Job System appeared first on Simple Talk.
from Simple Talk https://ift.tt/2xnk6La
via
No comments:
Post a Comment